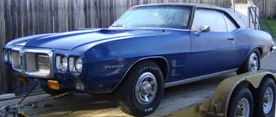
Just started on my 69 Firebird this past weekend, trying to get it started just to get a baseline on what it needs. I was planning on purchasing at least the factory assembly manual (based on my past experiences, that one helps a ton). But after chasing wiring for a couple days just trying to get it started it is evident I need at least the wiring diagrams much sooner than later. Went to Ebay and was overwhelmed with my choices (all appear to be factory manuals):
Service Manual Assembly Manual Shop Manual Body Repair Manual Wiring Diagram Manual
Is there one that is better than the rest (all inclusive)? I don't want waste $$$ on overlapping information.
On a side note, I realized it takes more than 3 half days of working on car that hasn't run for 7 years to get it back running!!! Got the main electrical components working, now chasing fuel issues (I think the carb has varnish/gumming issues and the pump won't pump), will tackle that this weekend...
I`d get the Service and the body manuals, the assembly didnt do squat for me...the wiring ,you can get online in color , just use Vikkis site http://www.thefirstgensite.com/
I found the Assembly manual invaluable (but then my car was dis-assembled when I got it.) The wiring diagrams are in the service manual as well. I haven't found the Fisher body manual to all that much help, but there is info in it that you can't find elsewhere. Buy as many as you can afford, but like Bjorn said, I'd start with the Service and Fisher Body manuals.
-=>Lee<=- Due to budget constraints the "light at the end of the tunnel" has been turned off!
Thank you for the replies, Vikki's site is awesome! Going to have to take the laptop out to the shop tonight. Have three wires, 2 off the alternator (I think added stereo/amp related), one off one of the oil sending units, that go nowhere right now. I'll post a pic later tonight of the mess of wires I cut out, all stereo/fog light/bull-horn related, anyone need a mid 80's Realistic tape deck!?!
As for the manuals looks like I'll start with the service manual, then assembly manual, then body manual and add to the library as needed in the future. Thanks for the guidence!
Based on your complaint and the skill level you imply, none of the listed publications will provide insight on the fuel problem. To further prove the point, I have the service manual that is shown in the link, and I know it fairly well because I'm a readaholic. Would someone please post the section/page number that will provide even a hint of a suggestion as to how this publication would aid someone trying to solve a fuel problem?
You need literature that instructs on basic troubleshooting skills, a subject that isn't covered in these publications. Even that will be limited instructions.
I don't do technical advice anymore; instead, I mostly offer sarcastic mouth to keep in tune with the evolution of this board.
I will, however, try to get you pointed in the right direction. Assuming that you have verified that the pump doesn't pump--that is step one--there are 3 issues.
The first, and most unlikely is an obstruction in the fuel line between the pump and tank.
Second and more possible is the pump is bad.
Third and probabaly the most common is faulty assembly. Here's where it gets dicey because there are two very common faulty assemblies.
The first faluty assembly is the pump arm sits atop, not under, the eccentric on the cam. The second and equally as common faluty assembly is that the ecentric on the cam is loose; as a result, the ecentric spins around rather than "rocking" the fuel pump arm.
Just like determing whether or not the line from the tank to pump is obstructed, determining if it's a bad pump, the arm isn't hitting the ecentric, or a loose eccentric is something you have to determine. I don't do technical advice anymore, and if you need instruction on verifying these issues, shows that these technical publications will be worthless as a solution to your problem.
I,m sure these manuels will be a big help in your restoration,might not answer all questions but still be a big help. don't mind Merv,as somewhere along the line he went sour.i looking to purchase the service manuel myself.looks like a nice car.
Disconnect the fuel line from the carb inlet, slide the nut up the pipe a bit, disconnect the + wire from the coil and tape it up, put a piece of fuel line on the end of the steel line and into a fuel-safe container. While observing and holding the fuel container, with a fire extinguisher close at hand, crank the engine and see if a reasonable volume of bubble-free fuel flows into the container.
If not, check fuel pump and eccentric and lines. If so, check carburetor. Do you have any spare parts on hand?
Vikki 1969 Goldenrod Yellow / black 400 convertible numbers matching
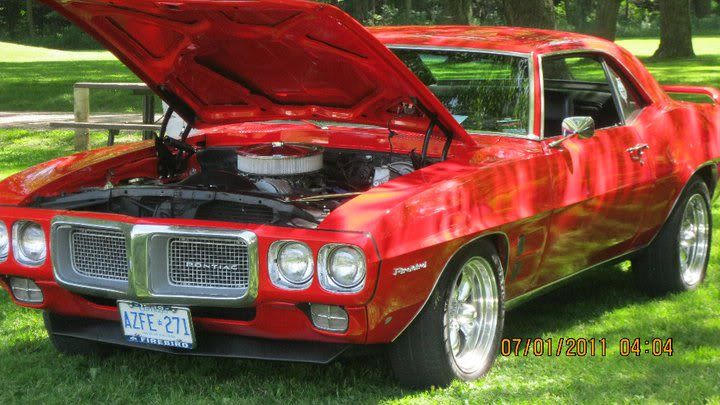
Well figured out the fuel issue, just needed primed, I guess sitting dry for seven+ years it needed a little help. Pulled the fuel line from the carb, using a small funnel I poured some fuel down it until it stopped taking it. Let it sit a while and then turned over the engine, pumped like a champ (all over the intake), should have read your post first! Anyways after that had more ignition issues, I couldn't get it to fire, tried timing it by hand (not running, rotating the body of the distributor), couldn't get #1 to spark. Looked under the cap and the rotor was still at least 2 positions away from #1 and the vacuum advance was hitting the fire wall. Looks like someone installed the distributor wrong (the wires matched the cap position in the Chilton’s). Rotated all wires 2 spots and finally got a spark with the timing mark 9 degrees BTC. Hooked everything up and it fired on the first crank! Now the bad news, definitely a low end knock on #1 (based on the spark plug I knew there was at least some blow by issues, can't find my compression tester, probably in someone else's garage). Shut it down and will be pulling it tomorrow (have a '73 400 already rebuilt offered to me to get the bird on the road). At least I have the baseline I wanted, original out for a complete rebuild!
Amervo, I see you no longer give technical advice, but what you did give was right on the money for trouble shooting, I appreciate it. Hope I didn’t imply that I don’t know what I am doing, just when I posted I didn’t have time to even trouble shoot, just figured after 7 years what ever fuel was in the system was varnish or gum by then. Pontiac is new to me so would rather have some guidance on the mechanical issues instead of thinking I can just apply my Chevy knowledge to it. The manuals are for the restoration, but based on the wiring harness I am looking at (cleaned everything up but realized there is no regulator in the system and the alternator I think is still the original style) I needed a wiring diagram ASAP (thanks Vikki). Now I will have the room to really work on the harness with no engine in there.
73 400 should be fine...I have a 72 400 in mine...you might just want to switch out heads..Im` not sure which are on a 73 , but 72 had 7J2`s, not very peppy...I got myself some 75 5Cs, milled down to 88 cc.. as long as you have the large valves and 86-90+_ CC`s you will get a strong engine for street use...should give yu a 9.2+_ CR , you could run regular...
bust out the cash and buy one of the replacement wire harness sets I've purchased three, one universal and two specific would you trust 40 year old insulation? they're monkeyproof! great results!!!
'69 with A/C uses an internally regulated alternator, not an external regulator.
Several ways to ID, but easiest is the shape and location of the two wire connector. It is two prongs flat side by side, - - on the top of the alternator case, not || in the back.
Vikki 1969 Goldenrod Yellow / black 400 convertible numbers matching
Thanks Vikki, if it has the side by side on top of the alternator case is in internally regulated? If so I won't pick up the regulator tomorrow, still have to figure out these wires that go no where, no rush now that I know I will be pulling the engine sooner rather than later.
As for the replacement engine, I'll have to get the specs, I know it is out of a '73 Grand Am, switched out to flat top pistons, balanced, slightly shaved heads, hardened valve seats, new guides, double roller chain, Comp Cam "RV" cam, 4brl intake, probably not as much HP as the original, but should get me by, also hopefully helps my brother try to sell the motor ("hear it run"). He built it up as a class project at a local JC. He tried to sell it several times down to $300, no takers, so it has sat on an engine stand for over 6 years now...
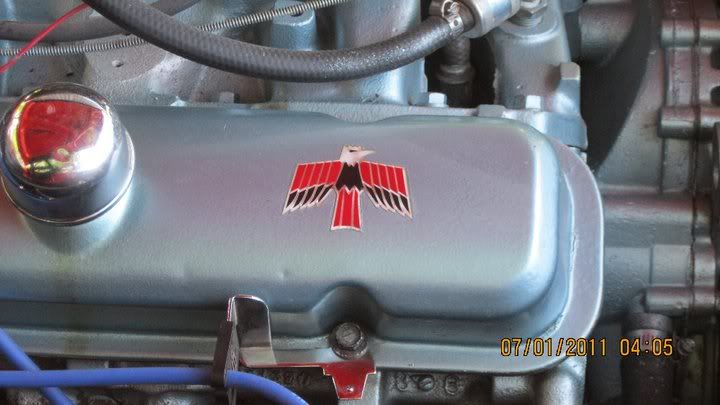
On the passenger side I have a harness that probably plugs into the AC compressor but I thought it was supposed to be the regulator harness the first time I looked at it. The A/C compressor is in the trunk and haven't pulled it out to even try to match it up yet. The white wire I have pulled up to the hood comes from an oil sensor (the larger one facing up), is it standard to have two sensors?
Not pictured, I have a wire off the starter that follows the large positive battery cable but terminates (again cut and taped) prior to the battery, just laying on the inner fender.
Between what you have told me, overbuilt68 comments, and my own frustration with this wiring, I will definately be looking at a new harness. I have already replaced several connectors (snapped wires at the connector)just to start this thing, it seems that if I move them I risk breaking another. I am in process of making a list of items to replace (my baseline) so I don't overlook anything in the process and have to replace something at a later date. Thanks to everyone for their help, I am now taking a step back to assess the project, reorganize the shop to make room for everything coming out of the car, wait for my manuals to arrive, and will start in earnest on the dissambly in the next couple of weeks.
I'd also go with a new harness. I was getting tired of chasing 40 year old wires that had been altered,etc... Was worth the money and helped clean up the look of engine compartment quite nicely.Be patient with the harness where it plugs into the firewall,it's a tough spot to get at and most of them are on there pretty good but you should be able to get it off. They make factory "custom" harnesses which take into consideration classic cars running applications as HEI and internal regulator alternator with the rest of the harness being factory fit so you do not have to cut and splice the harness to wire in above said applications.
David
http://FirstGenFirebird.org/show/closeup.mv?CarID=571 If i don't get this car back on the road soon i'm gonna go postal! On a quest for FGF knowledge 1968 Pontiac Firebird Convertible 1969 Oldsmobile Cutlass "S" Convertible *Sold*
The only difficulty with swapping the front and engine harnesses is reaching around the brake booster and master cylinder. With the engine out it would be very easy to reach from between the rails.
Vikki 1969 Goldenrod Yellow / black 400 convertible numbers matching
Looks like mastercylinder is coming out too (probably booster as well), don't like the fluid I see dripping from between the mastercylinder and booster. The list just keeps getting longer
Master is cheap and well worth it. Just follow the bleeding procedure and while you are at it, flush until all the fluid is clear from the wheel cylinders and fill with fresh fluid. Check your wheel cylinders for seepage as well, old rubber seals like to leak after first re-use.
If your master cylinder is the original, don't turn it in as a core.
Vikki 1969 Goldenrod Yellow / black 400 convertible numbers matching
")


.jpg "1229071027 (Small).jpg
Views: 330
Size: 40.24 KB")
.jpg "1229071016 (Small).jpg
Views: 329
Size: 46.8 KB")


