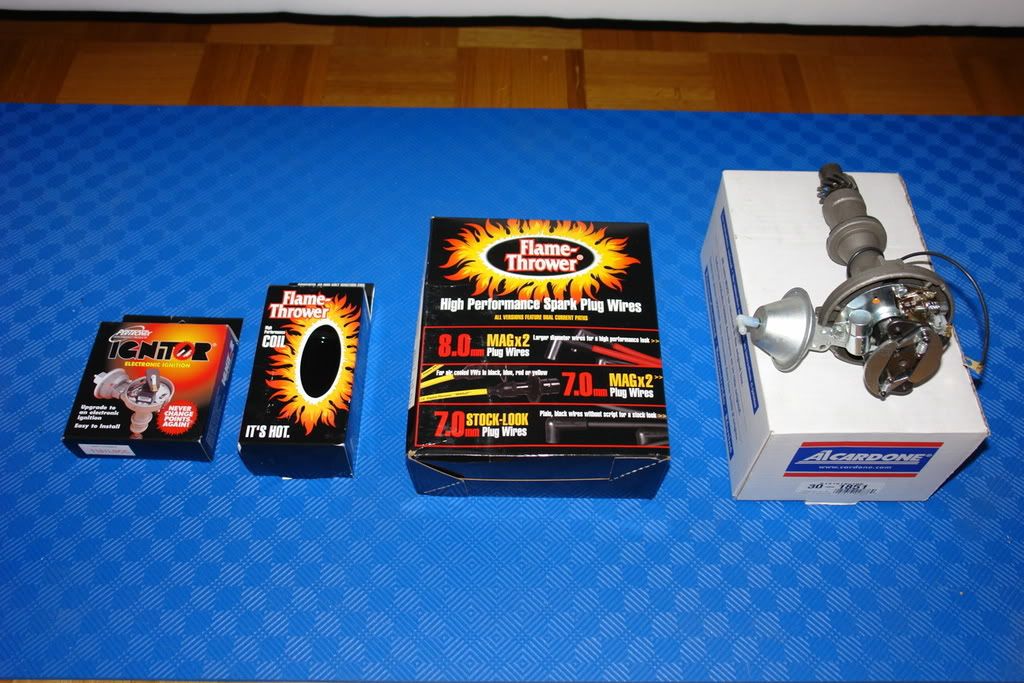
I notice some of the repo hood tachs state that they are for points ignition only. I have a GM HEI which has the tach teminal built in, Will the "points only" tach work with this type of HEI?
BTW, the "better one" Ames is selling is produced by "The Parts Place"... Ames even didn´t bother to erase the Parts Place sticker on the box when I purchased it one year ago. I bought two tachs for my 68 400 (one from PY because it has the correct bluish bezel for 68 Birds and the one from Ames/Parts Place with black face plate, both have real glass and both are nearly similar concerning quality); finally I went with the Ames/Parts Place tach because it was a tad better... In addition I didn´t like the sealing silicone that was pasted on the lower side of the PY tach because for painting I had to disassemble the tach and the silicone paste was only hindering... In addition it won´t prevent humidity to get into the tach (but surely to get once again out...)
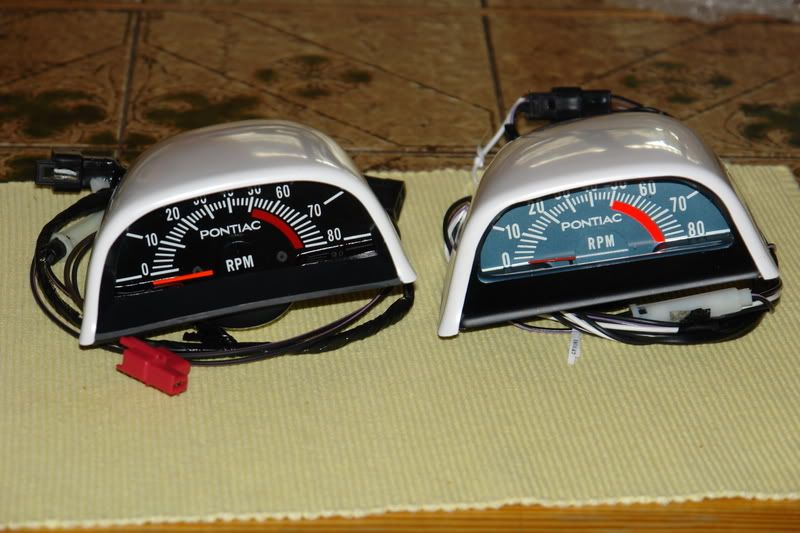
I already have posted some of these pics before but never mind (once again occupying some space on this forum )...
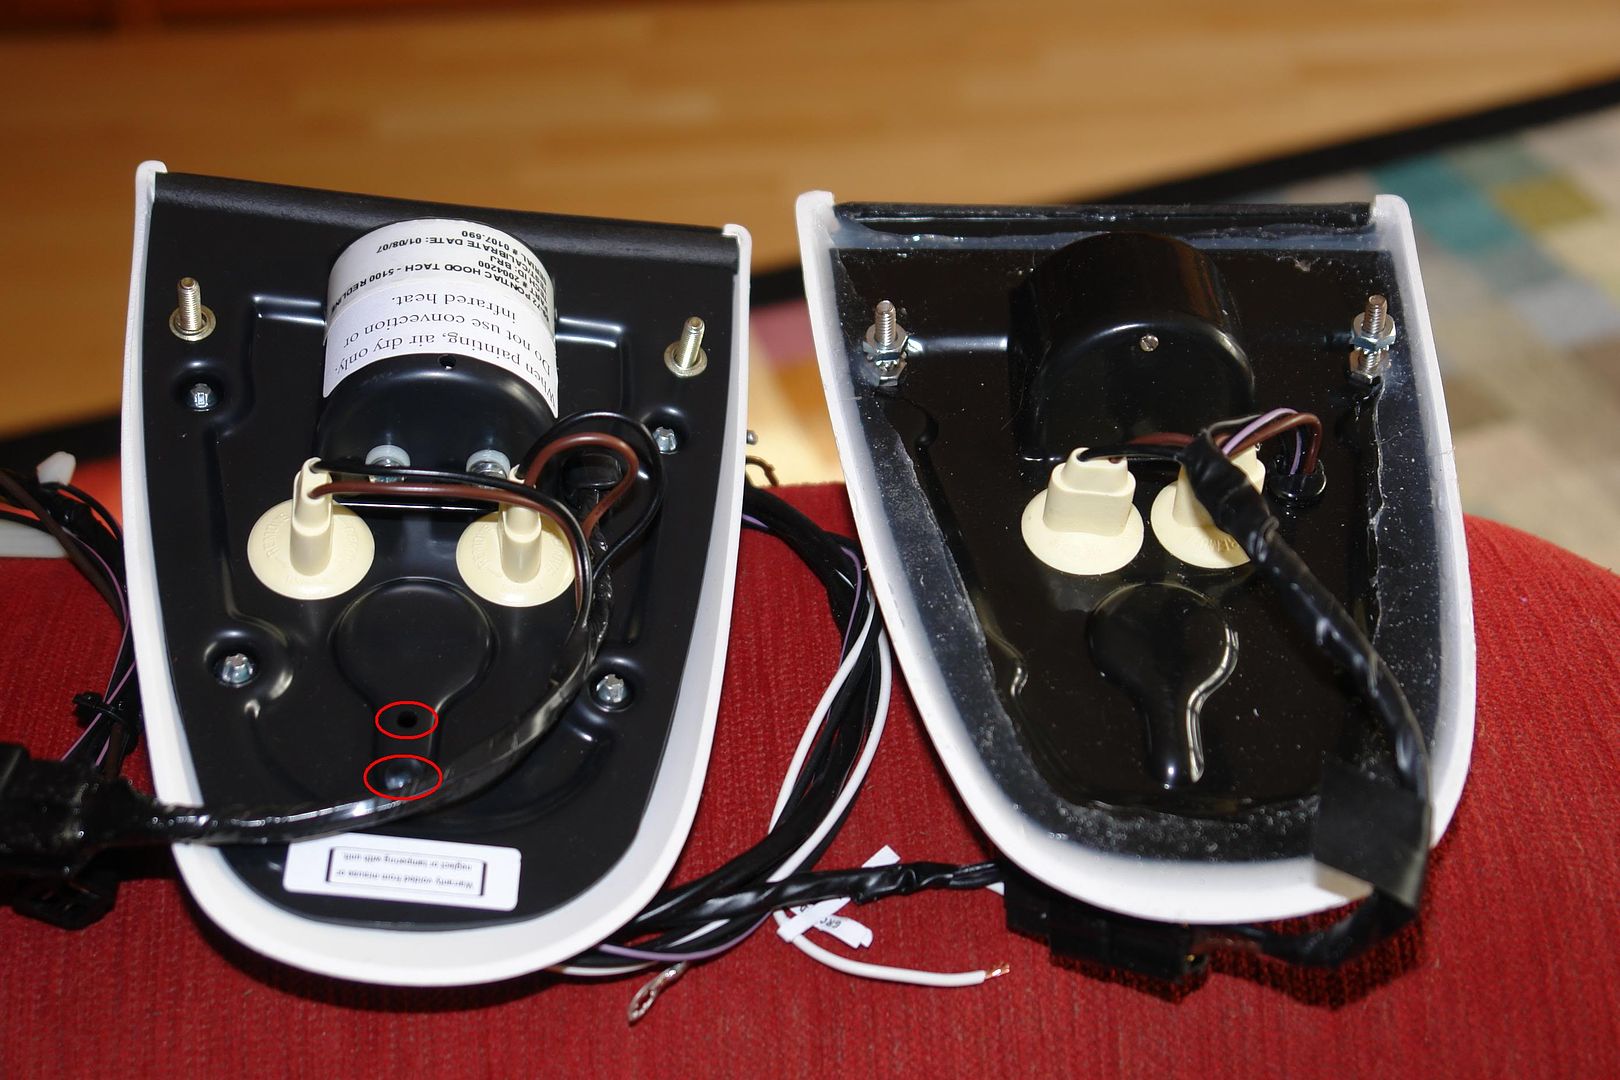
LH side is Ames/The Parts Place; RH side (with bluish face plate) is Performance Years:
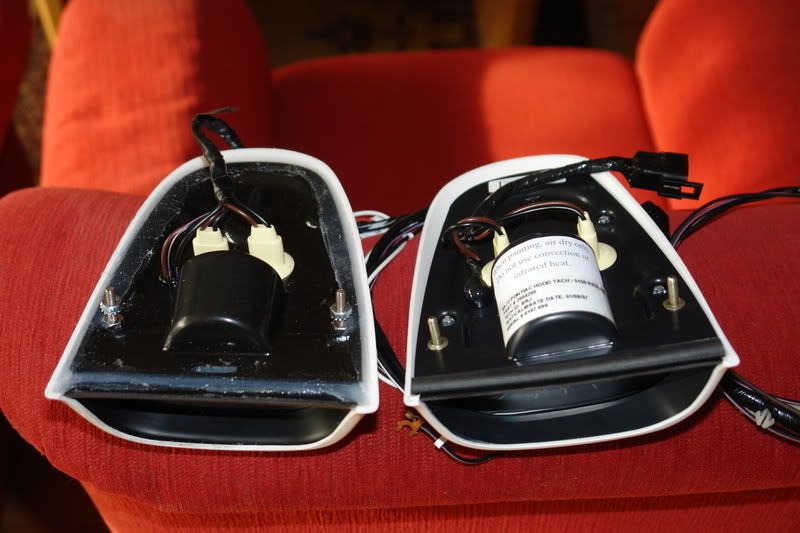
The one with the silicone is PY, the one without is Ames/Parts Place:
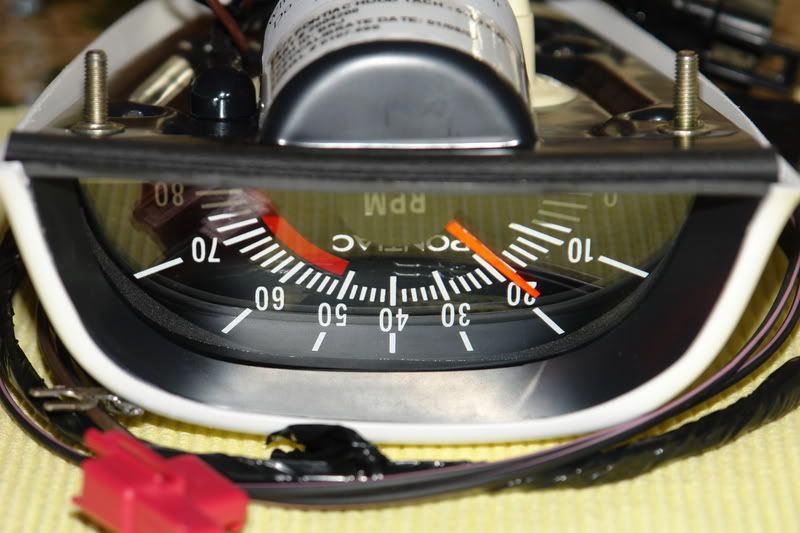
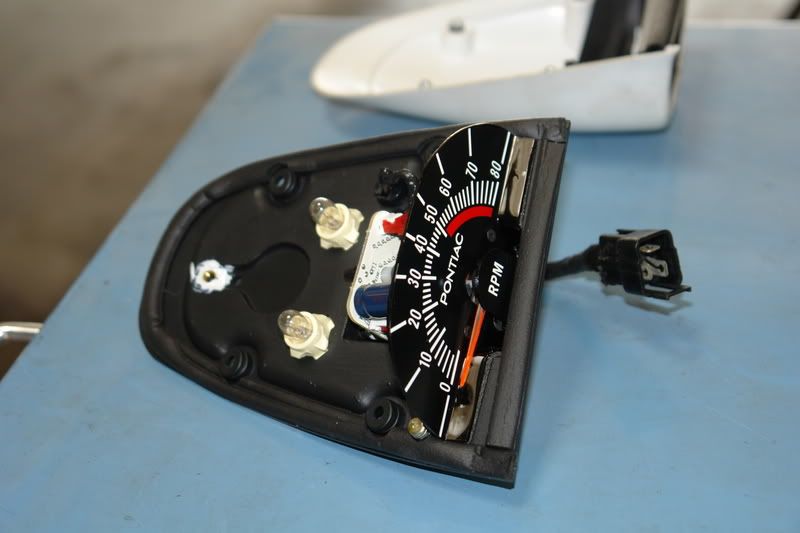
Ames/Parts Place:
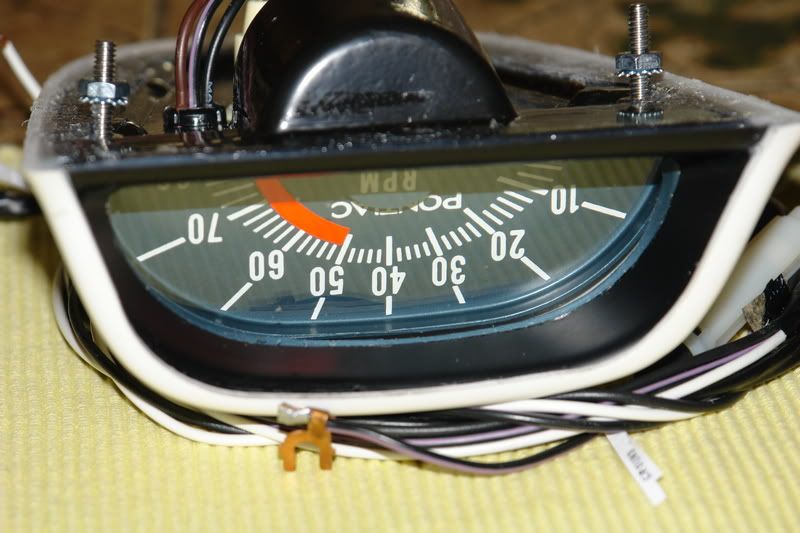
Performance Years:
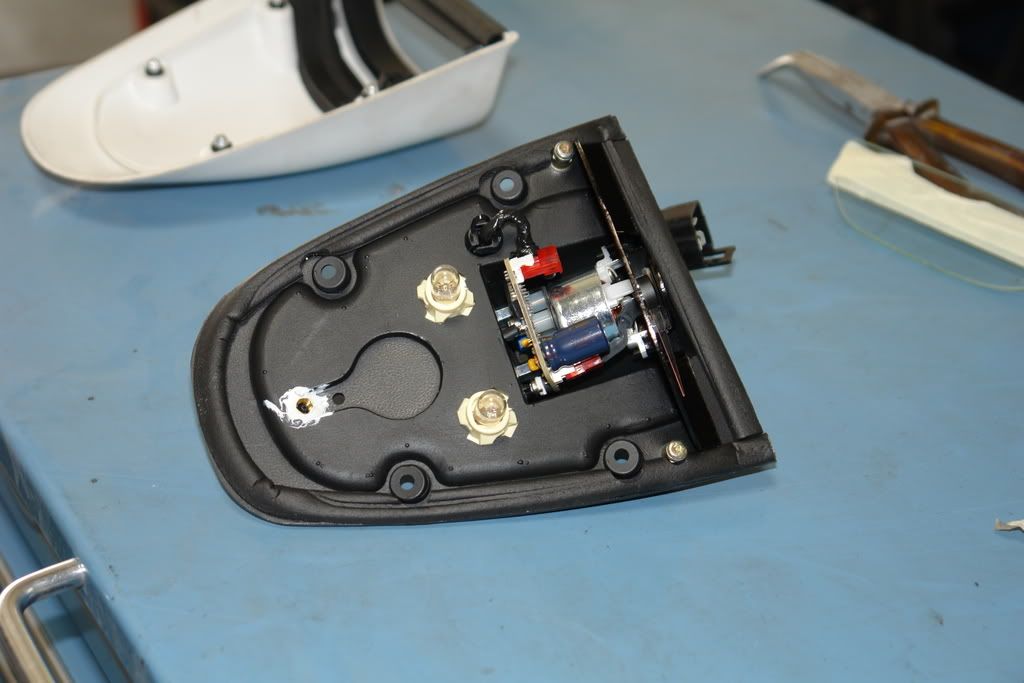
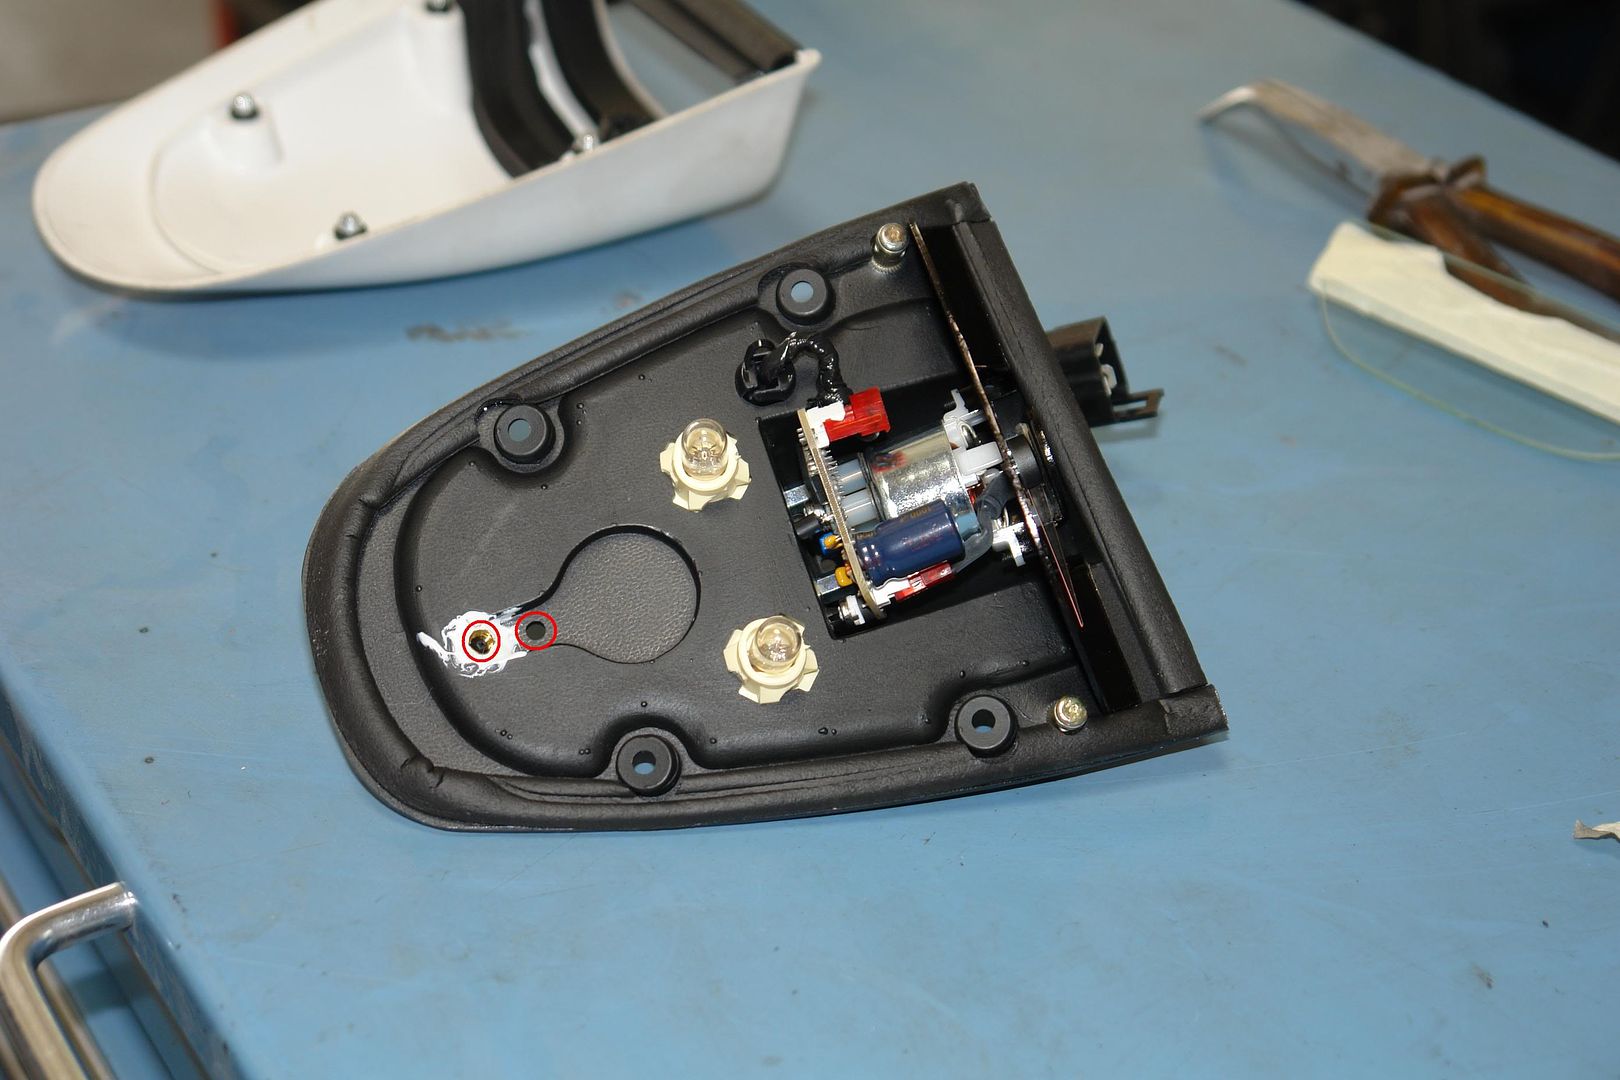
Here´s an insight in the Ames/Parts Place tach:
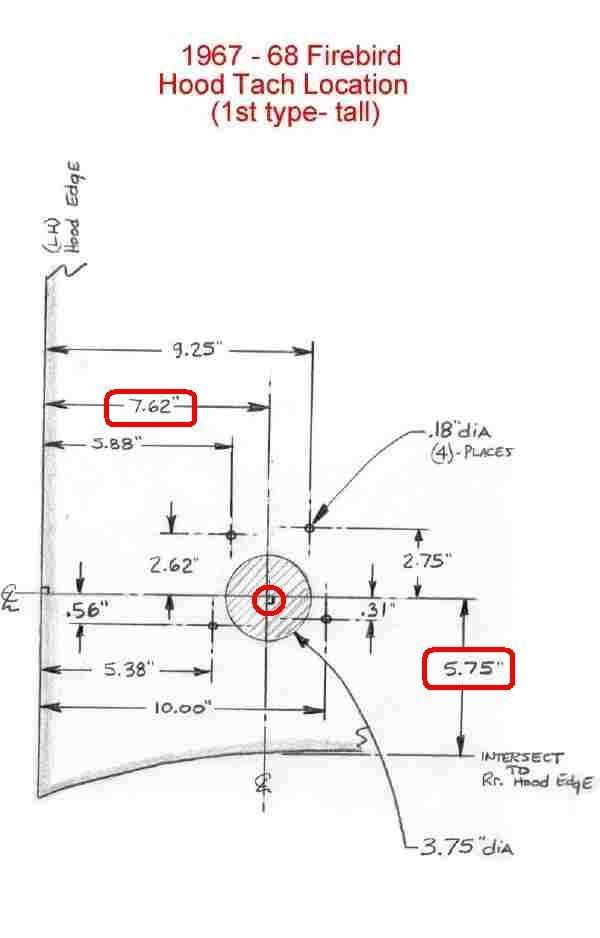
Below is the template I used for installation although both tachs had templates included (both were way off; think they were meant for GTOs). I copied it some time ago on the web, whoever made it did a very good job... Thanks a lot! Nevertheless, it´s the template for the tall style hood tach that was used 67 and early 68; I have the low style tach so I took only the measurements for locating the center of the tach hole (I marked them on the drawing with red loops) and went on from that (the low style tach needs only 3 fasteners in contrast to the tall style one who needs four of them.)
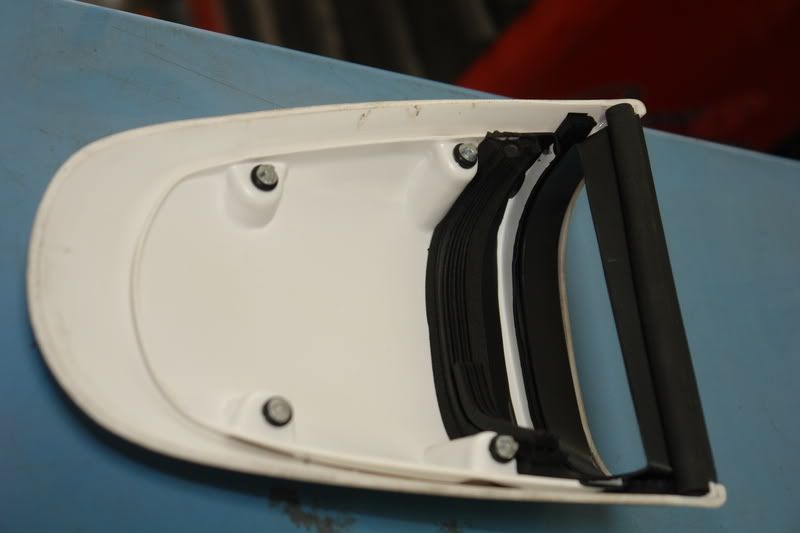
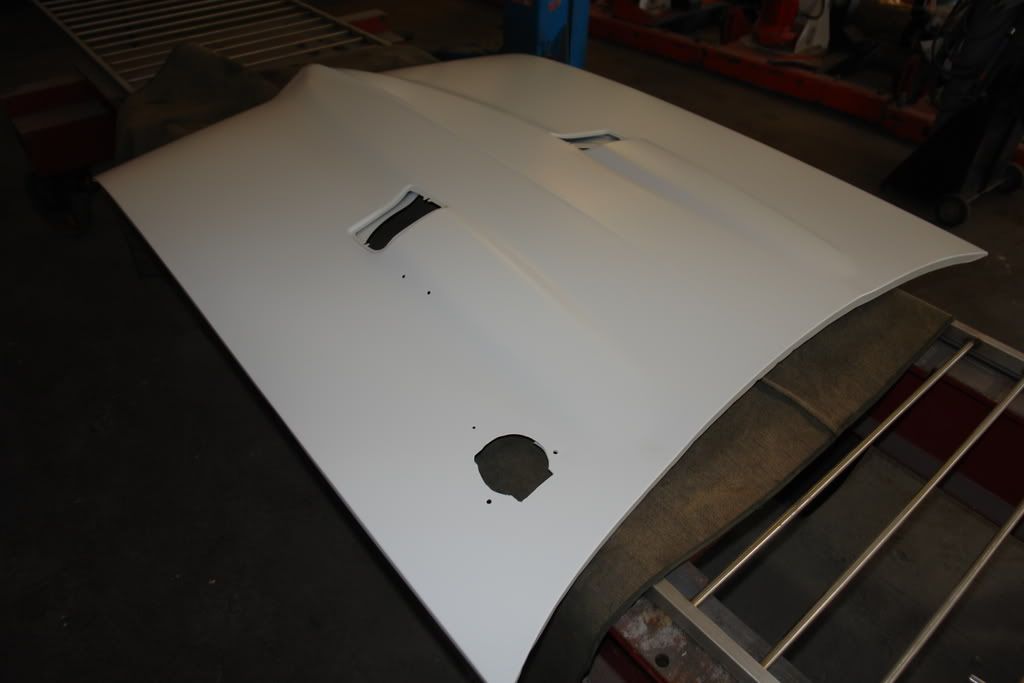
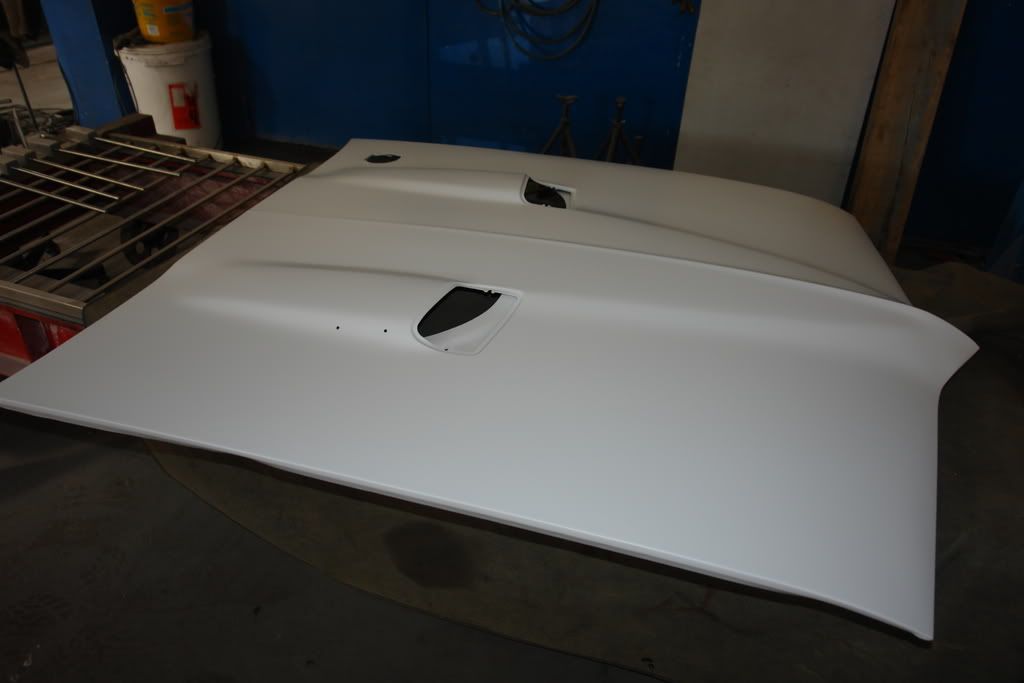
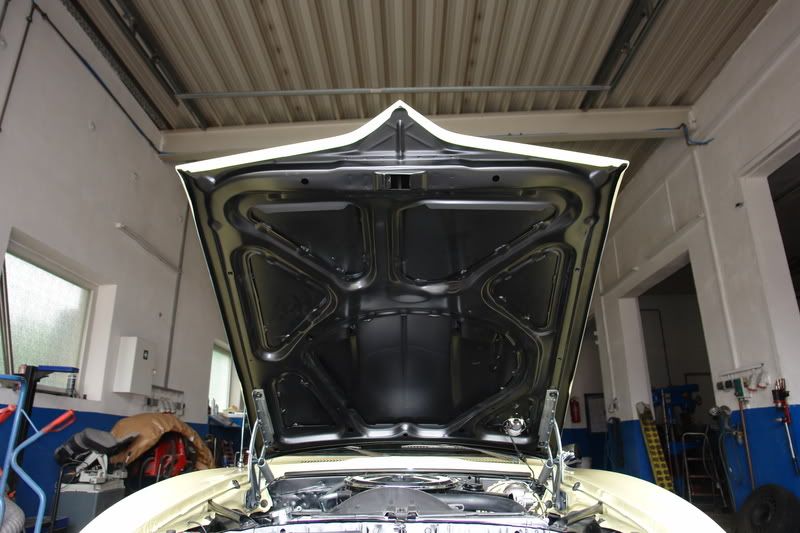
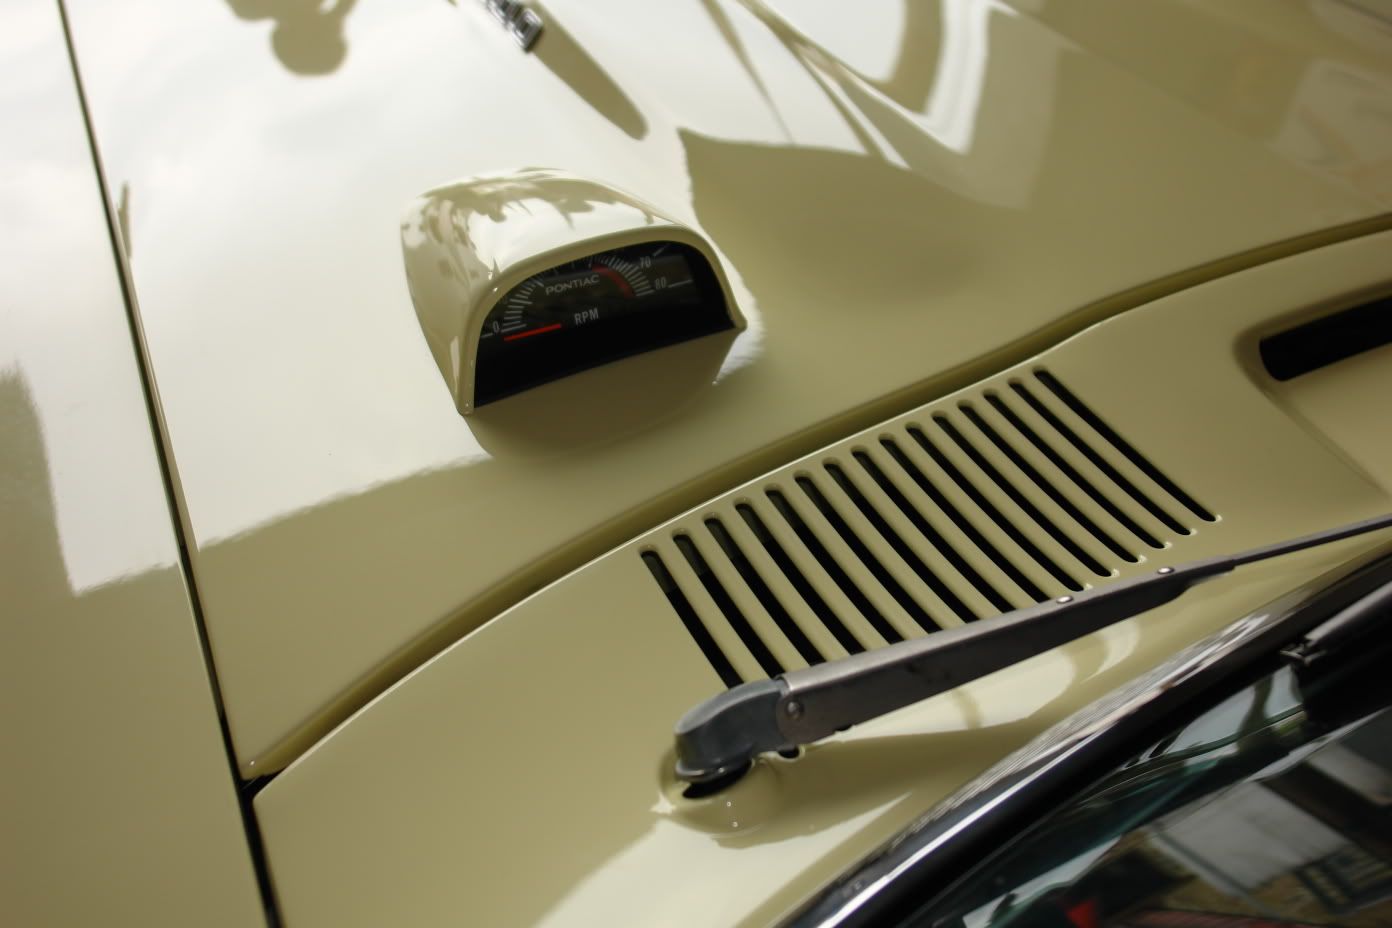
Here´s the hood after preparing for the hood tach and for the paint job:
I´m sure the face plates could be swapped but then again I didn´t dare. There´s lots of fragile components adapted and most of all I didn´t want to open the silicone sealed tach from PY. Perhaps I´ll do some day... Now that I know how to open them and how it looks inside it should be no big thread -- except preventing the indicator from getting bent or broken off...
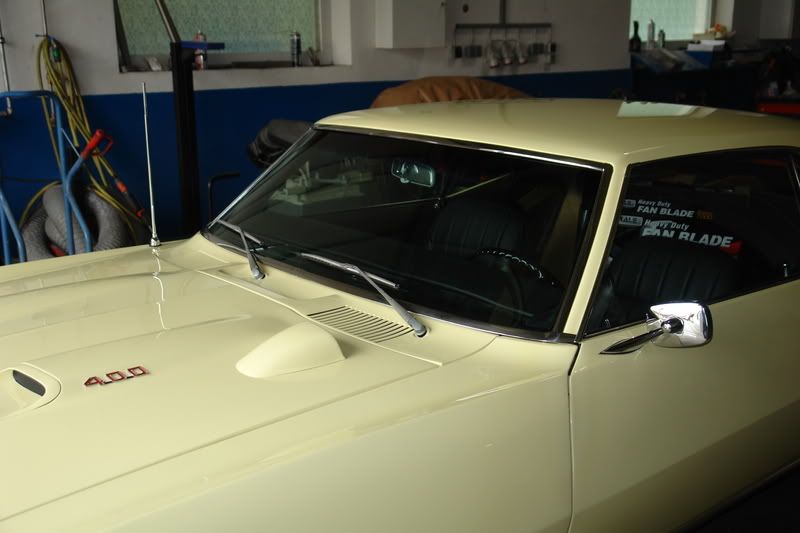
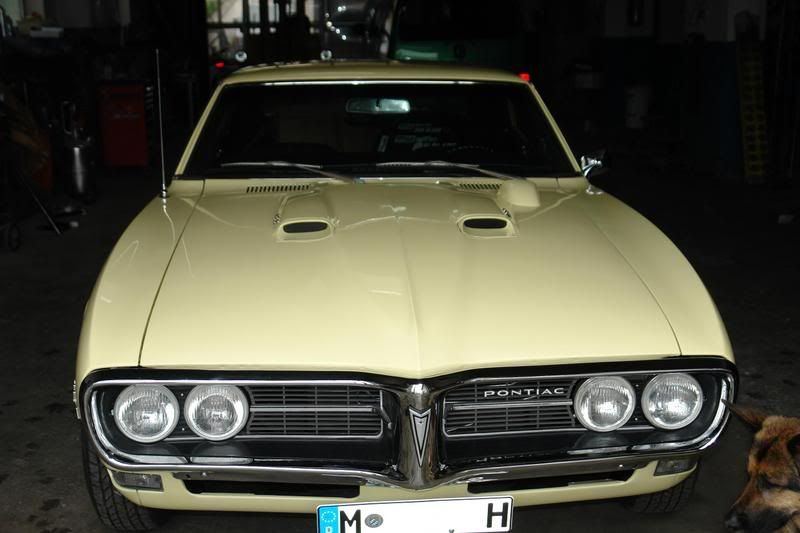
BTW - I´m running it with an Pertronix upgraded points distributor - now being pointless but still showing the correct look. No issues so far...
Thats the same ignition I have, and my stock tach will not work...simply jumps around, but the Pertronics techy said to put a 10,000 ohm 1/2 watt resister in line between the coil neg. and the tach sensor lead to fix it...yet to try it tho, need to get over and find the resistor...
Last edited by Dave's White Rock '68 Droptop; 06/09/0802:26 PM.
I see there are two bolts and a pop rivet for mounting it but I can't see how I am supposed to use the rivet. There is no hole in the tach body for it that I can see, just the threaded brass hole which I think is for the vent tube holder.
Anyone (Thomas, etc.) have any advice? I may be overlooking the obvious but I am stumped. Thanks
Also, how should I prep the plastic housing for paint?
Clean the housing very good with a professional paint prep cleaner. Then use a two part epoxy primer. Sand it with 220 and then 320 using a pad that would not let your fingers pressure show in the sanding marks. Clean it once more with the cleaner and it's ready for paint. If you are painting it black then you should use a black seal coat before painting.
please copy and paste these three pics. I made them high resolution but they are automatically downgraded on this site. When repasting them in an other folder you´ll get them high res again...
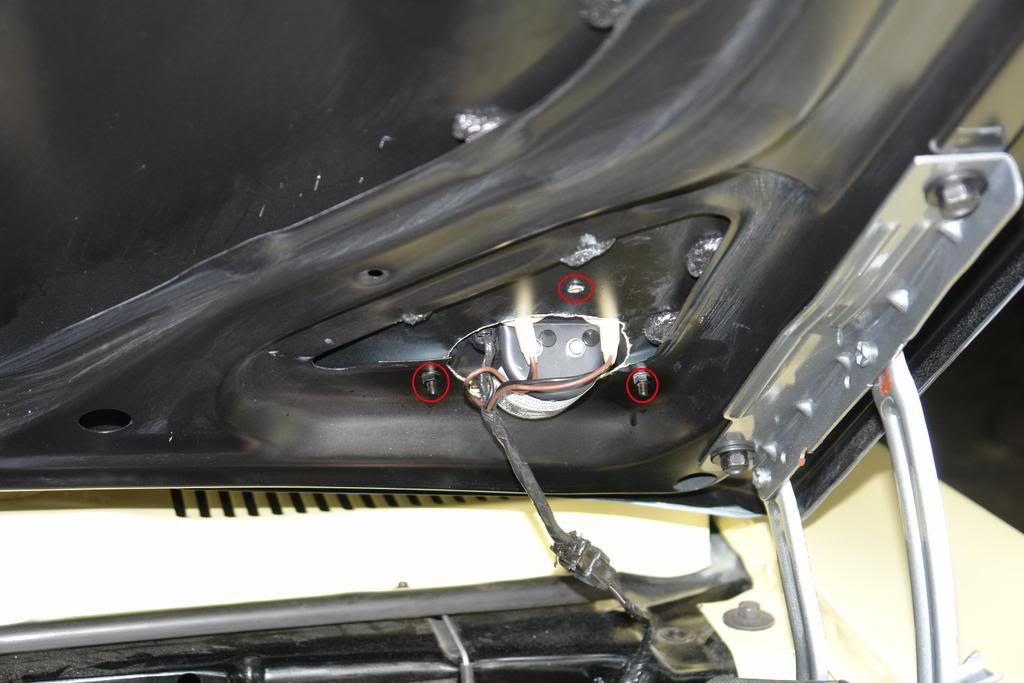
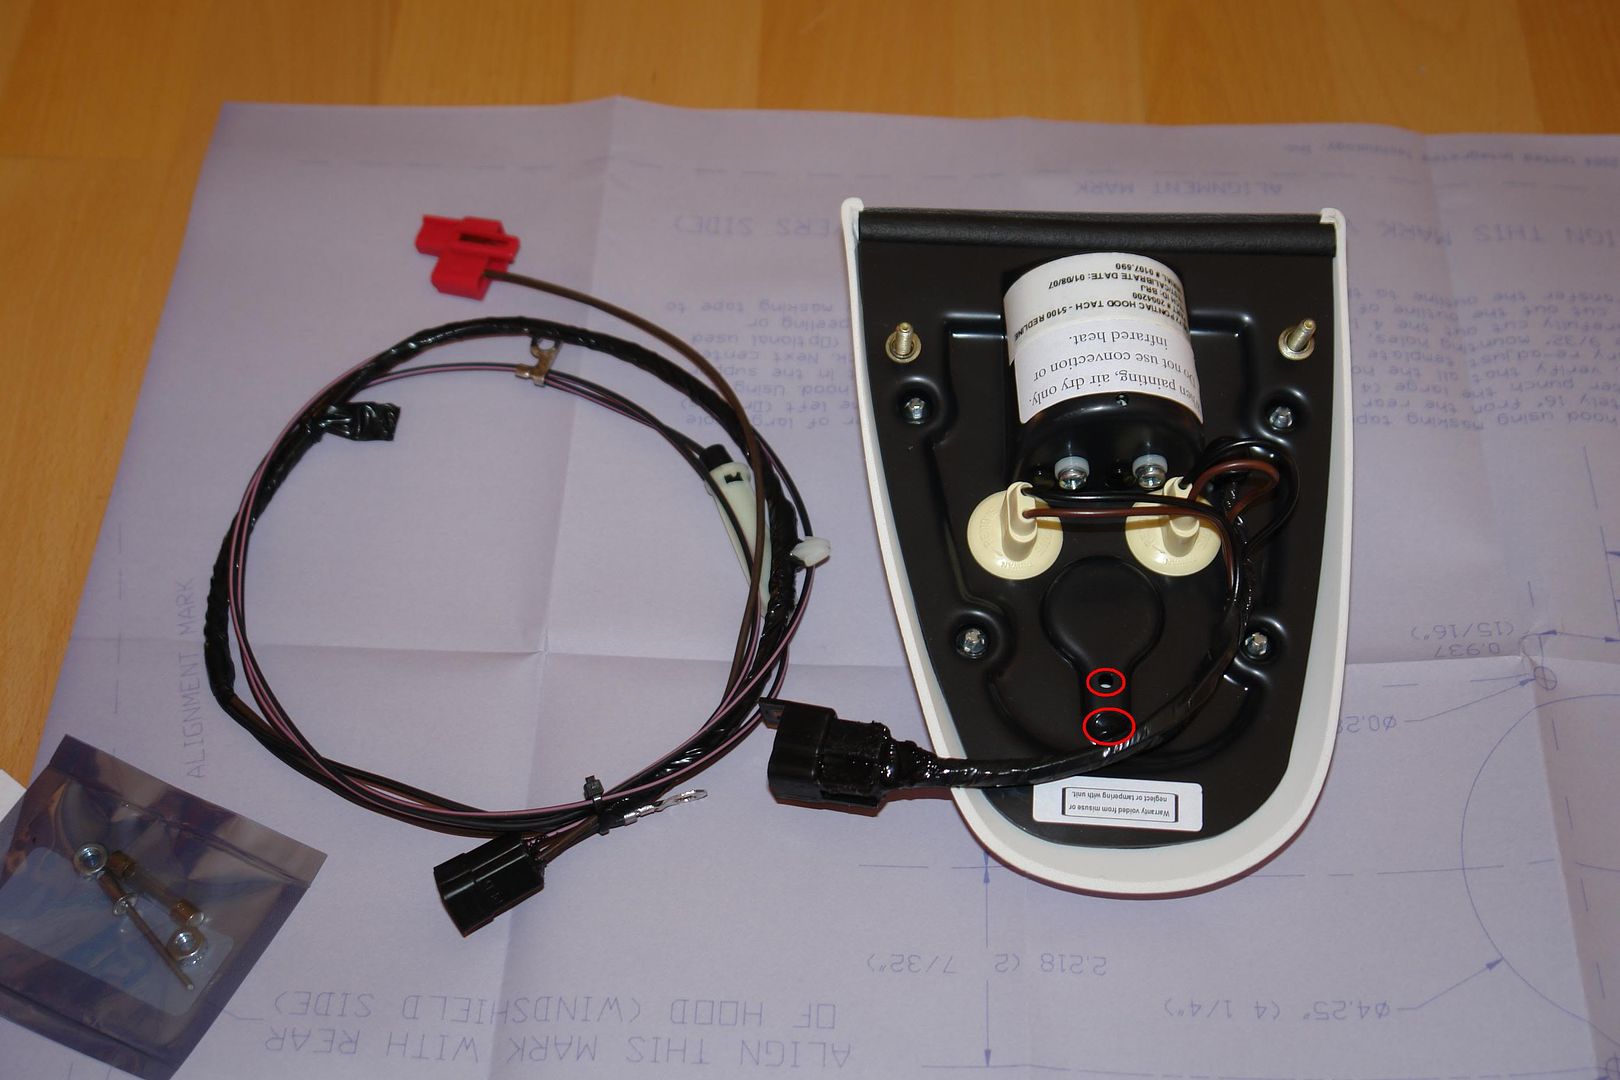
I marked both holes of the Parts Place/Ames hood tach. As you´ve mentioned before there´s a threaded brass hole that´s meant for the (later style) vent tube and then there´s a second one near the brass hole. The PY hood tach is missing both holes completely. If you should use a rivet - as I did (it came with the hood tach) - or a third stud or if you´ll need the third fixation at all -- I think that´s your own decision. I felt better knowing there´s a third fastener...
Please note: the brass threaded hole is protected with some small black plastic pin so you will have to look for it on these pics of the lower side...
You´ll see both holes best from the inside view:
BTW - in the first picture you´ll see the complete unit including hood tach, harness, fuse and the above mentioned rivet -- the latter one in the left lower corner. In addition you´ll see the template that didn´t work for me...at least I wasn´t able to fix it on my hood the way that the tach would have appeared at the correct location. IMO it´s meant for a GTO hood.
You also will notice that it is easy to disassemble the Ames/Parts Place hood tach - there are only 4 special bolts that you will have to open - I did it with some small pliers -- was much easier and faster than masking the tach - especially because the small inner edge just in front of the glass should be kept black and not body color as shown in this last picture:
Interestingly (to me anyway), my Parts Place tach appears the same as yours except that my 2 mounting studs are black in color and I have no hole for the rivet though a rivet was included with the tach.
I easily disassembled and primed the tach for painting (paint on order). I hope tomorrow to find the time (and nerve) to cut the hood.
Incidentally, there was a sticker that was affixed to the bottom of the orginal hood tach's that said, "DO NOT EXCEED 180 IN PAINTING" that has been reproduced by In-Line Tube. The sticker should have a "degree" mark after "180" but that detail was omitted from the repo, but it can be added with a small black marker. The sticker goes where the stickers are on the bottom of the above tach.
Well, I tried it....(I have Pertronics Ignition) and the needle went from jumping about erratically (with no resistor) to dead and not moving at all (with)....so I am back to square one it seems....
Give it a try, what the heck...I have the resistor if you want....had a hell of a time finding one, hardly any electronics parts stores around anymore now that everythings integrated circuits...
sure I'll try it - Right now I don't get any response from the tach. So what would probably end up happening is that I start getting the erratic response
The hood tach I bought from Classic in 2004 said the same thing, but when I installed the HEI and wired it up, all was well and the tach read just fine. Still does to this day.
Not sure why some repros are concerned about the HEI versus points. In my research it seems the "TACH OUT" connection on the HEI itself is properly prepped to send the appropriate signal to the tach.
'68 428 HO M3 Monster, 4-on-the-floor! Need I say more?
here's the one I have and I think this is the older style. I see a date stamp of 1967 on the back of the meter board. I figure I could by the Ames version that works with HEI and swap out the cover so I wouldn't have to repaint
I know I have posted this before but here is my experience with an original hood tach as per the part number. This hood tach was on the car when I bought it in 2000.
1) When I purchased my car in 2000 the car had a dist from a 70s Pontiac with HEI. The hood tach was connected to it and the hood tach worked perfectly fine with HEI (no resistor) just the original wiring harness etc.
2) I then bought a stock points dist and installed a Pretronix II system and once again the hood tach worked perfectly (no resistor).
3) I am now running stock points in a stock dist and once again the same old hood tach works perfectly (no resistor) etc.
So all in all I can verify that the original hood tachs from Pontiac will work with all three systems as I have seen and done them on my car with no issues.
In addition, my friend down here has a GTO and he recently bought an aftermarket hood tach from Ames. We unplugged mine and tried the new one and it worked perfectly. We then installed it in his car which is using an HEI system and again, the after market hood tach worked perfectly.
So based on my own experience with an original & an aftermarket hood tach they interchanged with no issues, no resistor, no bouncing of the needles etc.
Perhaps then there is (in mine at least) a problem in the tach circuit...perhaps a shorted capacitor or something...I assume if the needle is (bouncing) moving at all the little coil on the needle is OK. I may just open it up and have a boo inside....
")


![[Linked Image from img120.imageshack.us]](http://img120.imageshack.us/my.php?image=1968firebirdmc5.jpg)
![[Linked Image from img179.imageshack.us]](http://img179.imageshack.us/my.php?image=00000001kb0.jpg)

![[Linked Image from hosting.photobucket.com]](https://hosting.photobucket.com/albums/ss328/alvey_john/john-alvey-1968-Firebird-oct2012-2.jpg)