Just test fit the front sheet metal so that I had it all figured out before I coated the inner and misc. surfaces.
What is the best sequence to finish the body colour on the fenders. Should I paint the inner portion hidden under the hood (see my link, last photo) first, feathering it at the downturn, then install the fender, painting the rest with the body.
I also assume the fender extensins/valance etc are best primed first before mating to the fenders, then final bodywork and prime / paint
"paint the inner portion hidden under the hood first, feathering it at the downturn, then install the fender, painting the rest with the body. "
That's the safest way. I paint my fender extensions and valance separate then install. That way you have paint in that seam. Of course you would fit them first.
Yes, I too would prefer to paint the valance/extensions first, then install, to ensure good encapsulation.
I will feather the fender edge using the tape method I saw somewhere that made sense (leaving 1/2 the tape "rolled" up longitudenally to create a feathered paint edge rather than a hard one.
From what I have seen in high level professional body shops, they cut in the parts with base/clear and without taping, smiply allow the edge to fog over into the to-be painted area.
As Jim comments, if you paint it apart, you'll get paint protection in the seams. If you paint the fender and extensions assembled, paint will bridge the gap. If you need to disassemble the pieces later on, it will be nearly impossible to do without damaging your paint. So painting them apart is best. For metallic paint, they need to be in position or the metallic may not lay out evenly. For instance, hanging the hood from rafters will cause the metallic to orient in a different direction than if it's horizontal. When panels are painted in wrong orientations are placed next to each other, they can have contrasting appearance. So setting the hood, fenders etc on bucks that support them in their final position is best when spraying metallics.
Because of this issue with metallics, some painters will only paint the car assembled. For solid color paints, this isn't as important.
At the door and trunk openings, some painters paint the jambs first just as Amervo describes. Then they close the doors and mask the gap with 3M Soft edge foam masking made for this purpose.
The foam shape softens the blend edge. It also stops overspray from fogging inside the jambs. This is how a lot of collision repairs are blended. This soft edge masking can be accomplished by "back-taping" with tape. That's a method of folding the tape back on itself. You don't want to spray paint up against a hard tape edge because it will stand out. Even inside door jambs that will look bad.
edit:
I was typing at the same time as Jim. "Rolled tape" or back tape ~ same thing. The tape is stuck to the surface and paper, then folded back gently over itself.
Yes, that is the method I was going to use. I am going solar red with a 2 part polyurethane, so should work out ok, and I'll do them seperately as orientation will not be an issue.
A yellow sealer works great under the red. Brightens it up. To really brighten it up use silver under. It will result in a slightly different color than the chip though.
Dave, have you ordered your paint yet? I am going to order a quart early this week for cutting in of components. Let me know if you come up with the correct paint mix code. I'm still waiting to here back from a local PPG paint supply house as the books do not have the proper ratios. They told me they need to get it from corporate and it takes a few phone calls.
I'm very curious about the price of the solar red. I'm guessing around $600 per gallon.
Thanks for the yellow sealer tip Jim. I may have to consider the extra step.
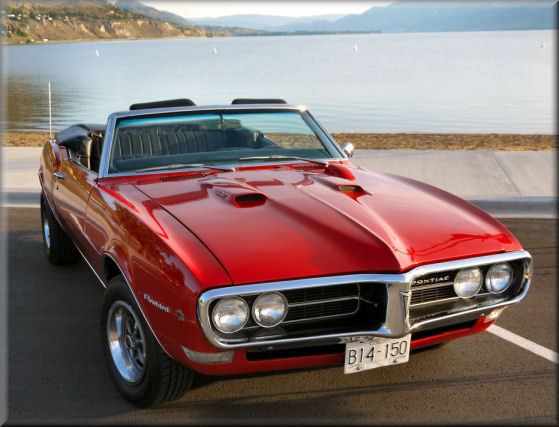
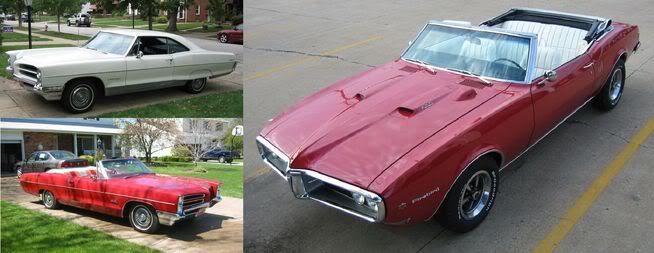
68' Firebird 400 convertible, numbers matching, solar red w/ deluxe parchment interior. 66' Pontiac Ventura Hardtop 66' Pontiac Catalina Convertible
Single stage Concept urethane DCC in Matador Red Code DCC3192 SC (The PPG name for Solar Red) for the '68 code 71634 costs $98 per quart. Here is the tint codes on a quart can.
Base/Clear Deltron 2000 DBC in "Matador Red", Code DBC3192H, here is the tint code on a pint can.
Here is the inside of the trunk lid with a finger swipe each of dbc and dcc smeared on. Okay, not as scientific as mixing with the hardener and spraying out a panel, but it gives an idea as to color match against the original color.
Here are the same samples photochopped so you can't compare the glossy edge, which confuses things.
For the upper dash paint, flat Burgandy 71486 for a 252 code car (Red/Red) in DDL lacquer, the part number is DIA71486. Here is the tint code on the pint can. The shop matched the paint to a dash brought to him and it matched when he finished. Perhaps that is why the label is marked. Cost $42.15/pint.
Lower dash, Regimental Red in DDLSC lacquer cost $57.95 for one pint. Part number is DIA71591SC This is the tint code for one pint. This will need to be sprayed out to see the match because it has flattener. That is the DX265 ingredient on the label.
Lacquer is still available in some parts of the country. I doubt you will find in in California.
By yellow sealer do you mean a primer/sealer? I would not mind brightening it up a tad as the sample I have had mixed up is not quite as "bright" as I hoped.
Our local auto paint supplier mixed it up off the computer, there was no problem finding the code. I see Cat has given you the mix so hope you are good to go.
I hope to be ordering a quart to do the cutting in this week...should I just go ahead and get what I need for the whole car or is there a shelf life? Likely won't have the car painted for a few months at least.
I just got off the phone of a very reputable local paint supply house. They were having problems locating the correct mixing code for a base coat/ clear coat Solar Red. They called PPG and had them utilize their internal color library. According to PPG, their has not been a proper formula prepared for Solar Red in a BC/CC. It is available in all of the period paints from the time, but not modern BC/CC. They were sending the information down to their color matching lab this morning to have a proper formula made up. It turns out, the Matador Red is close, but not exact match to the Solar Red.
It will be interesting to see the formula differance.
68' Firebird 400 convertible, numbers matching, solar red w/ deluxe parchment interior. 66' Pontiac Ventura Hardtop 66' Pontiac Catalina Convertible
Hmmm, my guys did not seem to have a problem, but they did report it as being called Matador Red as well, but I will question him today and report. I do know that in the single stage paint the computer said that the actual colour may be "bluer" and slightly darker than it should be.
Can they not take the tinting guide Bigbird posted and work back?
It's not a primer. It's a sealer. I always use it so that the shinkage totally stops under it. Primer and filler can shink over time. One day your paint job looks perfect and then you start seeing old sanding scratches and the outlines of any bodywork. Some colors, like black, you have to put a sealer under. Your PPG guy will recommend the perfect sealer for your color paint. Seriously, don't skip this step.
Now that I know I certainly will not ship the step of the sealer.
I have lots of time to get it right. I assume it is a product I can apply myself prior to the finalpaint which, will be "professionally applied". ie is it a matt finish? Does one sand it lightly before final paint?
Cat, let me know the formula they come up with. I will compare with what my supplier came up with.
It looks like a base coat. You can lightly sand to get rid of any surface imperfections. Ideally, you don't have to sand it. Pictured is the kind that was recommended with the last black paint I bought. A few years ago I used a yellow sealer under the Imron Berry Red on a different car.
I have been painting black lately. The last three cars! When I used the yellow it was for Imron and they had yellow already tinted in that brand. Your paint guy will have to give you the exact type you need. It has to be specific because it's right under your base coat. The sealer pictured is for Deltron DBC basecoat. It can be tinted yellow.
I'll be interested to hear what PPG comes up with. To make matters more confusing, there is a Pontiac "Matador Red" for 1969 and it is not even simlar.
68Bigbird, boy that looks pretty darn close based on the picture alone. Let us know after it dries a bit.
I just got off the phone with my local vendor. PPG came back with a name 'Nifty Red' and paint code 71643 (from a previous thread, that was the paint code for Solar Red as well).
He wouldn't give me the complete mix code unless I ordered at least some paint from them first. When I read off the color formula from above, he said the mixtures were really different from each other. It had mainly red, some white, violet and 2 oranges.
68' Firebird 400 convertible, numbers matching, solar red w/ deluxe parchment interior. 66' Pontiac Ventura Hardtop 66' Pontiac Catalina Convertible
If they make DBC in code 71643, that would have to be correct. Did PPG issue a new recipe today in response to your inquiry?
Jim made an important comment about sealer color altering the final appearance. My spray out tests are over the original color. The paint would look different over yellow sealer than it would over black. I need to do another spray out over the actual sealer I plan to use.
I think doing a test spray-out is essential before buying $400 worth of paint and spraying the whole car with it.
I also just had another thought. I do not have one piece of metal with the original color still on it to compare to. Every square inch has been removed and epoxy primed at this point.
68' Firebird 400 convertible, numbers matching, solar red w/ deluxe parchment interior. 66' Pontiac Ventura Hardtop 66' Pontiac Catalina Convertible
Bigbird, let me know how the tests work out. Cat, if BB is using the same formula, we can let him compare to the original paint. I too have no sample left.
If PPG went to the trouble of creating a new formula for DBC 41643, they must feel the new formula will be a more accurate match than DBC3192H which their jobber sold me when I requested Solar Red 41643. He's never seen the car, so he didn't match product to suit. This was per the formula.
I don't know how we will know if the new formula is a better match, since Catalina doesn't have any original finish to compare against. I don't plan on buying any more or different paint for a while. I will be using the DCC3192SC single stage for the interior floors to become better aquainted with that product. I will be spraying that over black DPLF.
As I look at the sample some more, the differences are mostly because of the clear coat, not the tints. The bc/cc looks deeper and brighter in color when you're off-angle. Looking straight on, it's pretty difficult to discern differences. BC/CC looks sort of like an apple dipped in sugar. Really, this is the reason I am looking into their single stage urethane in the first place.
I think lacquer would look best to obtain the original appearance. I think JimC2002 is right on concerning that and he did a beautiful restoration, detailed on his site.
The BC/CC is a compromise on appearance while an enormous improvement on durability. By that, I don't mean it will look worse. I mean it won't look "correct". I think BC/CC will take considerable labor flattening out peal. However, my Solar Red Firebird that I had in 1968 was alligatored and chalking in 1973. I can't see doing my paint over after five years.
I have a small amount of this DBC3192H that I can send someone interested in comparing. It is not a catalyzed product, so the bit that is mixed has shelf life remaining.
Here is the sample with clear added over the original.
I have a sample in the single stage as well, it was "bluer" and darker in appearance, That is why I went BC/CC. I am interested in durability and I can certainly compromise original appearance in this regard, although I bet the NEW appearance afforded by BC/CC is not necessarily a bad thing...
Cat, are you going to get a sample of this new formula? Bigbirds looks good and a I am anxious to order, but can wait a few days if a sample is forthcoming.
Uhuh, like pulling the raw sheet metal off the front and POR'ing the undersides, like finishing the starter hookup, backup switch, gas guage wiring, pulling apart the right a-frame to put in the missing bumper, masking off the interior tub for the cutting in.....that outa keep me busy for about..... the next week...
I look forward to seeing photos of your cars with fresh paint. Both of you are way ahead of me. Dave, why don't you wait and see how the new formula looks. $100 per quart is plenty to spend on paint.
OK, I picked up the paint today. This weekend is pretty busy with the wife and kids but I will find the time to do a spray out. Looking at the paint it looks a little darker than I expected. That may change when it is thinned out.
Here is the mixing info for it. (1 quart formula, only bought a pint though.)
")


![[Linked Image]](http://i6.tinypic.com/14scsad.jpg)
![[Linked Image]](http://i6.tinypic.com/14scswk.jpg)
![[Linked Image]](http://i6.tinypic.com/14se5oi.jpg)
![[Linked Image]](http://i6.tinypic.com/14sfdyt.jpg)
![[Linked Image]](http://i6.tinypic.com/14scxz7.jpg)
![[Linked Image]](http://i5.tinypic.com/14sdws3.jpg)
![[Linked Image]](http://i23.photobucket.com/albums/b376/restorium/emb003.jpg)
![[Linked Image]](http://i6.tinypic.com/14x0yvm.jpg)
![[Linked Image]](http://i5.tinypic.com/14y1ijq.jpg)


