|
|
Joined: Sep 2003
Posts: 44
Member
|
|
Member
Joined: Sep 2003
Posts: 44 |
...eccentric/timing chain.
Man, this thing has definitely been two steps forward, one back!
Summer's busy in a tourist town, been working 55-60 hrs per week (Thank God I have a job!), so it's taking forever to get anything accomplished.
Very first thing, went to drain the radiator, the [censored] plug snapped right off, so repairing the radiator is one more thing I didn't want to do!
ANYWAY, to make a long story longer, I'm down to the crank pulley/balancer, and it's not breaking loose. When I crank on the 1" bolt holding it on, all I do is spin the engine.
When I pulled it from my 65 Mustang Fastback (don't be hatin'!), it was on an engine stand and I could stop it with a prybar through a hole in the flex plate. With the engine in the car and the manual trans/flywheel, that won't work.
Any suggestions?
Last edited by jahsboy68; 08/09/10 12:47 PM.
|
|
|
|
|
Joined: Jan 2009
Posts: 3,049 Likes: 10
Senior Member
|
|
Senior Member
Joined: Jan 2009
Posts: 3,049 Likes: 10 |
Big friggin impact wrench...or pull the flexplate cover(assuming automatic)and put a pair of vice grips on to keep the motor from spinning.
-Jeff
|
|
|
|
|
Joined: Jan 2009
Posts: 3,049 Likes: 10
Senior Member
|
|
Senior Member
Joined: Jan 2009
Posts: 3,049 Likes: 10 |
Oops, didn't see you had a manual, should be able to just leave it in gear to keep the motor from spinning.
-Jeff
|
|
|
|
|
Joined: Aug 2010
Posts: 8
Member
|
|
Member
Joined: Aug 2010
Posts: 8 |
the impact does it every time....doesnt take much
|
|
|
|
|
Joined: Jul 2009
Posts: 313
Member
|
|
Member
Joined: Jul 2009
Posts: 313 |
It might be turning because the bird has camaro rims....
|
|
|
|
|
Joined: Jan 2009
Posts: 3,049 Likes: 10
Senior Member
|
|
Senior Member
Joined: Jan 2009
Posts: 3,049 Likes: 10 |
It might be turning because the bird has camaro rims.... That was rough.... 
-Jeff
|
|
|
|
|
Joined: Dec 2007
Posts: 10,337 Likes: 3
Premium Member
|
|
Premium Member
Joined: Dec 2007
Posts: 10,337 Likes: 3 |
It might be turning because the bird has camaro rims.... They go nice with the Mustang engine... Frankenbird!
I used to be indecisive. Now I'm not sure. I feel like I am diagonally parked in a parallel universe. 1968 400 convertible (Scarlet) 1976 T/A - 455 LE (No Burt) 1976 T/A New baby, starting full restoration. 1968 350 - 4 speed 'vert - 400 clone (the Beast!) 1968 350 convertible - Wife's car now- 400 clone (Aleutian Blue) (Blue Angel) 2008 Durango - DD 2008 GXP - New one from NH is AWESOME! 2017 Durango Citadel - Modern is nice! HEMI is amazing! 1998 Silverado Z71 - Father-daughter project 1968 400 coupe - R/A clone (Blue Pearl) (sold) 1967 326 convertible - Sold  1980 T/A SE Bandit - Sold
|
|
|
|
|
Joined: Apr 2010
Posts: 6,758
FGF Premium Member
|
|
FGF Premium Member
Joined: Apr 2010
Posts: 6,758 |
There is a slot on the balancer to put a bold or screwdriver that can hold the balancer back. Or if you have a manual tranny then put it into 4th gear and put the park brakes on. Use a long bar or snipe so you get maximum force on the bolt. After you get it out you will then need a puller to get the balancer off.
Engine Test Stand Playlist: https://www.youtube.com/playlist?list=PLwoxyUwptUcdqEb-o2ArqyiUaHW0G_C88restoring my 1968 Firebird 400 HO convertible (Firedawg) 1965 Pontiac Catalina Safari Wagon 389 TriPower (Catwagon) 1999 JD AWS LX Lawn tractor 17hp (my daily driver) 2006 Sequoia 2017 Murano (wife's car) 202? Electric car 203? 68 Firebird /w electric engine 2007 Bayliner 175 runabout /w 3.0L Mercuiser__________________________________________________________
|
|
|
|
|
Joined: Sep 2003
Posts: 44
Member
|
|
Member
Joined: Sep 2003
Posts: 44 |
Tired, not thinking so well. Had it in first instead of fourth, kept crawling on me.
Don't have an impact, but the four foot breaker bar did the trick. Gave the seam a good squirt with some penetrating oil, my next day off I'll go rent the puller and get that sucker off.
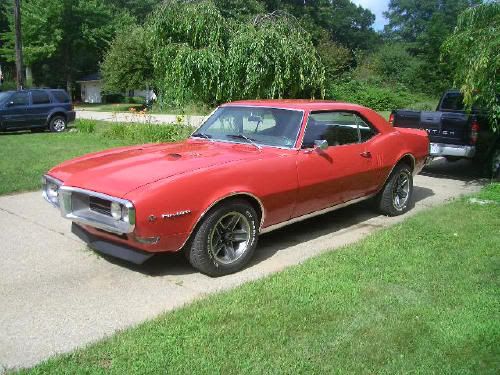
Yes, I know, camaro rims (notice I didn't capitalize, Firebirds have always been better). One of my neighbors passed away, his son had a couple cars in the garage he had to get rid of since he was losing his storage. Got it almost as you see it for $3500, so I don't care about the rims for the moment.
Besides, isn't it more important to get another Firebird back on the road? This one's been parked since 1996 and I'm doing the best I can with no money and no time!
And it IS a bit of a Frankenbird. Not an original 400, but the guy I got it from did the swap, said the motor came out of a mid-70's TA. He replaced pretty much all the sheet metal except the roof, then I think he got discouraged because it still needed so much work.
Since I've had it, I've had the framerails, trunk floor, and drop-offs replaced, new leaf springs and shocks. Redid the brakes, switching to silicone. I just finished the gas tank with the Eastwood sealer kit, new gas line, fuel pump, rebuilt the POS Holley which I'll probably replace anyway with an Edelbrock just for the reliability, etc, etc.
Right now I just want to get it running again! The few times I've had it out, the 400/4 spd just pushes you back in your seat. WAY cool!
|
|
|
|
|
Joined: Sep 2003
Posts: 44
Member
|
|
Member
Joined: Sep 2003
Posts: 44 |
Lupdiesel, I took a quick look at your photobucket, nice car. At some point, I'll have to do the same, pull the subframe and redo the front end... someday!
|
|
|
|
|
Joined: Jul 2009
Posts: 313
Member
|
|
Member
Joined: Jul 2009
Posts: 313 |
THANKS jahsboy!!
Now you know I was just pulling your leg.. I don't have much room to talk since my bird won't be running for another, hmmmmm 5 years. Plus I put some S10 wheels on just to move the car around. (They're not in the pics) The stock wheels were to small for the disc conversion kit from right stuff..
Good luck,
Kyle
|
|
|
|
|
Joined: Sep 2003
Posts: 44
Member
|
|
Member
Joined: Sep 2003
Posts: 44 |
Actually, not just Lupdiesel, but ALL the cars here are incredible! Haven't seen one I DON'T like!
Mark
|
|
|
|
|
Joined: Mar 2004
Posts: 11,905
Valued Mentor
|
|
Valued Mentor
Joined: Mar 2004
Posts: 11,905 |
You really should not need a puller. Remove the four retaining bolts from the crank pulley and it should pull off with just a little effort.
|
|
|
|
|
Joined: Jan 2009
Posts: 3,049 Likes: 10
Senior Member
|
|
Senior Member
Joined: Jan 2009
Posts: 3,049 Likes: 10 |
Hey Mark, I'm assuming you're going to get a complete timing cover gasket set, just make sure you get the Felpro one with the repair sleeve for the balancer. When you get the balancer off check it for grooving where the seal seats if you have grooves, use the repair sleeve or you'll be leaking oil from there if your not already. You may or may not be able to get the balancer off without a puller...I had to use one.
-Jeff
|
|
|
|
|
Joined: Sep 2003
Posts: 44
Member
|
|
Member
Joined: Sep 2003
Posts: 44 |
Thanks yellowbird. I used some stereo prybars (to keep things even) and it DID pull off- until it hit the crossmember that is. Crap! Do I have to undo motor mounts and jack up the engine now? This is turning into the project from he!!.
Dr. Drivability, yes, gaskets, and thanks for the Felpro tip, I did see those listed as a "recommended" product with the timing chain at Summit. There is some oil down that way, haven't been able to see if it's grooved though.
|
|
|
|
|
Joined: Jul 2009
Posts: 313
Member
|
|
Member
Joined: Jul 2009
Posts: 313 |
I'm lost. Need a picture. You shouldn't hit the crossmember taking the balancer off. The crossmember should be under the middle of the oil pan. Maybe its the center link? Sway bar?
Although I could be crazy since I have no engine in mine to compare to.
|
|
|
|
|
Joined: Sep 2003
Posts: 44
Member
|
|
Member
Joined: Sep 2003
Posts: 44 |
Looks like this:  There's the big cross member under the engine with the mounts, then the smaller one in front of the engine. The pulley is bumping up against the smaller one. It also seems to be stuck now, I'm not able to push it back in. WTF?
|
|
|
|
|
Joined: Mar 2004
Posts: 11,905
Valued Mentor
|
|
Valued Mentor
Joined: Mar 2004
Posts: 11,905 |
The pulley is bigger than the balancer. That's why I recommended taking out the four bolts holding the pulley to the balancer. The groove in the balancer is probably not lined up with the key anymore, keeping it from going back on easily. Try a little rotation to see if you can line them up, or just unbolt and split the pulleys from the balancer.
|
|
|
|
|
Joined: Sep 2003
Posts: 44
Member
|
|
Member
Joined: Sep 2003
Posts: 44 |
I've been trying to take it slow, and ask questions first (what a concept, eh??!!). It's been a long time since I've dived this deep into something, and I'm sure it's easy once you know the secret!
Vikki, I did take your advice and removed the four bolts, but it did not separate. I guess I didn't know it was a two piece affair. I think if I put something like the right size wood block behind the pulley section and (GENTLY!) tap the snout with a hammer, it should break loose. Failing that, a puller should separate them, yes?
Again, thanks for everybody's patience and assistance, there's been a couple times when I just wanted to throw in the towel, but walking away and taking a break seems to be helping.
|
|
|
|
|
Joined: Aug 2006
Posts: 1,458
Member
|
|
Member
Joined: Aug 2006
Posts: 1,458 |
Just take out or loosen the two motor mounts bolts and place a jack under the engine and jack it up.Be carefull where you place the jack as to not damage the oil pan,Maybe use a short piece of lumber between the jack and engine.don't lift on the oil pan.just another idea.
Harry 69 Firebird 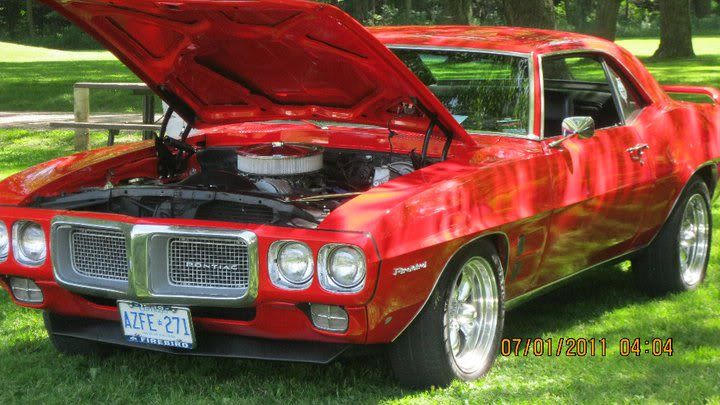  _________________________________________________ 1969 firebird 350/auto 2012 mustang v6 (wifes car) 2012 jeep compass (winter vehicle) 2008 dodge ram 4x4 Hemi
|
|
|
|
|
Joined: Sep 2003
Posts: 44
Member
|
|
Member
Joined: Sep 2003
Posts: 44 |
Free at last! Free at last...
Vikki, you were absolutely right. I put a couple blocks between the pulley and the engine block, two light taps with the hammer on the snout, and it practically fell off! You have no idea what a relief that was!!! Then the balancer slid off, and again, YES, the slot and key did line up, looking at it while it's off (smacking myself in the forehead) I do remember that from the one other time I did this about fifteen years ago.
Now I just need to wait for parts and I can begin reassembly. Knowing how it comes apart, at least that part should be (SHOULD BE!) much easier.
As long as it's apart, anything else I should be looking at? Sure don't want to do this again anytime soon!
|
|
|
|
Forums57
Topics35,534
Posts298,850
Members8,862
| |
Most Online19,810
Feb 1st, 2026
|
|
|
1 members (Dr. Drivability),
1,839
guests, and
212
robots. |
|
Key:
Admin,
Global Mod,
Mod
|
|
|
There are no members with birthdays on this day. |
|
|
|


