Could someone measure from the chrome trim to the first bow on the convertible.
Also could someone post pictures of the bottom of the header so i can see how the fabric folds over and is tacked to the tack strip. Id like to see how the round trim is tacked to the header also.
The instuctions for my Robbins top said 22 1/2" in the middle with the well trim chrome on. Some advice: use 2 spacer sticks from the back header bow to the next one. As you put the side pads on, the material will strtech and the window will stretch. Had to do mine 2X before I used the spacer sticks. They are in the folding top manual below.
I didn't get any pics of my front bow before I glued the final top material over my staples. But there is a diagram in the fisher body manual sect. 13 page 13-19 of how it all goes together.
Also here is a video of installing a vert frame and top on a 69 'bird. The top install starts about 1/4 of the way through the video. I hope the link still works.
Thanx. It was a huge pain in the a$$ with a lot of hours spent learning how to do it. Quotes for just the labour around here were $1800 - $2200 then I had to buy the supplies. ridiculous. So I figured I'd give it a try. Even if I wrecked 2 tops at $300 each I would be money ahead. I Got 'er done with the first one although it was stapled and removed quite a few times where it attaches to the rear trim sticks. Lots of trial and error but it turned out OK.
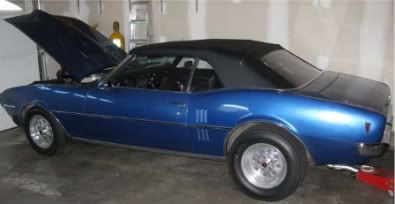
Thats the way i look at it too i can waste several tops for $2200. i bought a top from AMES perfomance because i live an hour from spofford NH. Its a key convertible top. came with detailed instructions rofl. They basicley said unpack, lay them in sun , attach to car and enjoy. So ive been reading , and when i see a first gen rag top at the cruise nights i take pix of the way the front is attached to the header. your car is almost the same color as mine. I painted it myself its a 2006 nissan 350z daytona pearl blue.
Did you look at that video link I sent? I watched them do the front header 100 times I bet. Mine is finished a lot like that one but I didn't use the welting strip like they did. I Didn't think I needed it, still don't.
The P.O. painted it back in 1980 along with the 455 transplant. Its been garaged ever since. I have no idea what this color is, but it was originally April Gold.
one more question , i have called support for installing my top and got three diff. answers. my top has a chalk line on it already from the manufacturer. Does this line up on top or bottom of the trim stick?
Ah Jeeze thats a tough one. My Robbins came with a line too but I quickly found out it was wrong. Your top should have a bend up where the rear bow staples to it. That header will need to be 22 1/2" (well, that was my measurement) from the chrome trim. If you attach the bottom too short/long this won't line up properly and won't be tight when its 22 1/2".
I waited and had most of the top attached before I stapled the top to that rear header. I figured if I messed that up, it was game over.
From the edge of the pinchweld chrome to the bottom edge of the rear bow measured in the middle of the car (if that makes sense). On page 1 of that section 13 folding top manual link I sent earlier they talk about making holding sticks that will keep that rear bow at 22 1/2". I had trouble until I did that. Made it easier.
Thats were I got my staples - at an interior shop. My air stapler didn't take any kind of standard staple. He was very helpful. I also bought some expensive ($34 bottle) plastic window conditioner/wax stuff there. Alas I used it too late though, had scratches in the window the first time I drove with it down. i should've applied it when the window was new. Oh well. next time.
I bought a Paslode 22 gauge uphostery air stapler. I takes 3/8 crown staples and I used 3/8" long on everything except the front header where I used 1/4". I had a b!tch of a time finding the 1/4" ers.
i have to put my top on hold for a bit . i couldnt get the frame lined up correctly. The center bow on the right side is lower than the left. the hinges that stop the top from going too far down are bent/worn out. I thought i had repaired all the joints , i guess i missed this one. There is a little nub sticking out on a piece of the hinge that stops it. The joint is so sloppy it goes right past the stop. Thank god for oxycetelene torches ;-) the hot rivets are worn , and the arms are bent. so tomorrow i'll fix those.
When I installed my top I stapled the top and the front edge welting to the long tack strip on the header bow. But this leaves the staples exposed. On your photo I do not see any staples on header bow. Is there something covering the the staples.
In his first post he mentions that there is top material glued on to cover the staples. I've done a lot of things on my car myself, but when it came to the top I had my upholstery guy do it. Fifteen years ago he only charged me $300 to do it. Now I'm thinking, if it has to be done again, I just might try it myself.
Hank, yeah I would have gladly forked over 700 or 800 to install but the idiot shops around here quoted me 1800 - 2200 in just labour then I had to buy the materials. Jeeze !!!So I did it myself.
Larry, on the front of mine above the window is a soft round gasket that is much like a round bungee cord material. I wrapped that with the supplied material but I left the one side long enough that I could overlap it and contact cement it on over top of all the staples. I think it turned out pretty good. Now I go to car shows and see professionally installed tops with those staples exposed!! You could also cut and glue another piece of material to cover them. Thats how mine was done last time.
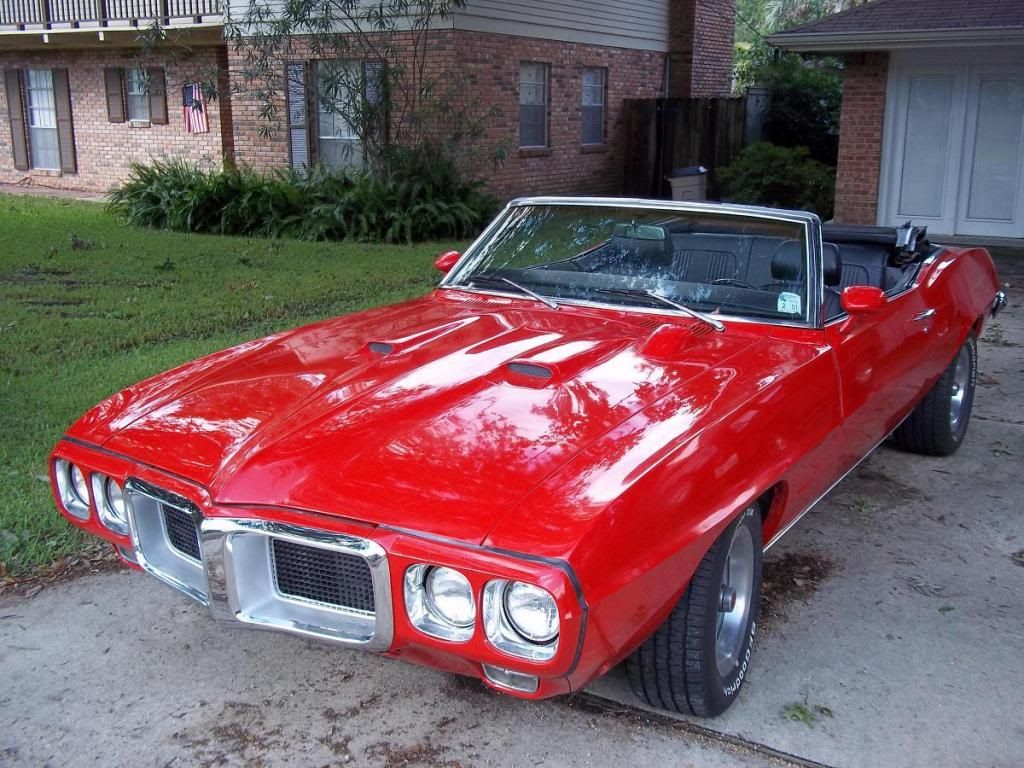
This is a near finished pic of the front header seal with the top up. Its the round bump in front. A supplied piece of the material wraps around it. The bungee cord like gasket is glued to the material, then the roof side is stapled to the tack strips and the other side is glued over top of the staples.
I wrapped the material around the bungee cord like material and then stapled. This left the staples exposed. Your method is better you got the benifits of staples but a lot cleaner look. At most shows I see the staples exposed even the big buck shops do it that way. Our local gto resto/blowhard was even proud of how it looked.
")


![[Linked Image from i601.photobucket.com]](http://i601.photobucket.com/albums/tt95/920-680-1902/firebird/Photo_2006_1_29_22_27_15_edited_edi.jpg)


