|
|
Joined: Oct 2006
Posts: 417
Premium Member
|
|
Premium Member
Joined: Oct 2006
Posts: 417 |
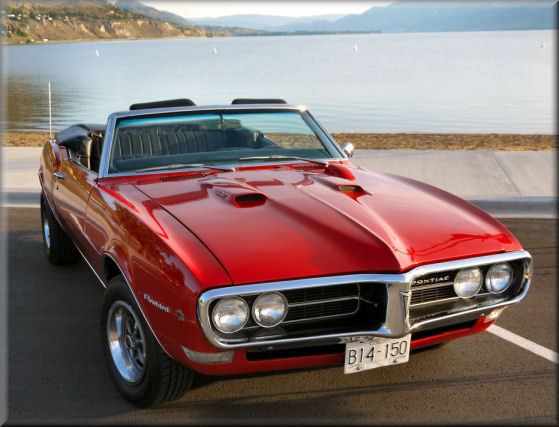
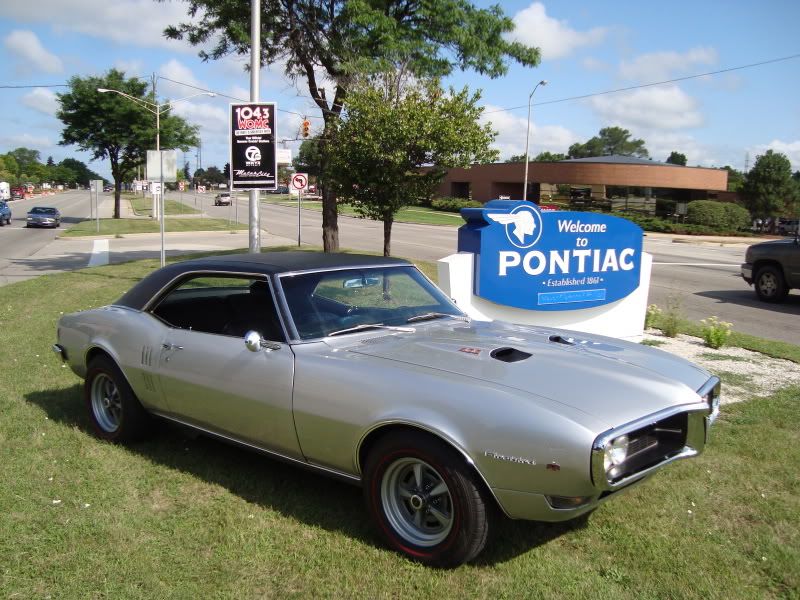
...found thread on PY awhile back on opening hood scoops. Opening scoops ...not sure why it took him 2 1/2 hours a side though?? Took me about 10 minutes each. I have a 400 hood I am getting ready to paint and install. Mean time took a die grinder and ground back of scoops till the "ribs" on the scoops start to appear. Looks good and is debatably functional. Looks pretty good, ay? Kel
|
|
|
|
|
Joined: Sep 2001
Posts: 14,265
Valued Mentor
|
|
Valued Mentor
Joined: Sep 2001
Posts: 14,265 |
WOW Not that was 'smart thinking' on how you did it. Keeps the bugs out.  
|
|
|
|
|
Joined: Aug 2006
Posts: 1,071
Member
|
|
Member
Joined: Aug 2006
Posts: 1,071 |
Good job,Kel. The scoops I have someone started cutting away the whole inside. The metal there is pretty thick & I'm having a he// of a time finishing them. I don't have a die grinder though. Anyway, yours look good!
|
|
|
|
|
Joined: Oct 2006
Posts: 417
Premium Member
|
|
Premium Member
Joined: Oct 2006
Posts: 417 |
The metal isn't real thick on the ribs when you get 'em done......not sure if they will hold up to those huge Texas dragonflies at 80 mph....guess we'll see
|
|
|
|
|
Joined: Jun 2000
Posts: 20,054
Administrator
|
|
Administrator
Joined: Jun 2000
Posts: 20,054 |
Looks Good Kel....not sure if its going to help any....I just painted mine flat black instead (as You know)on the "hole" , but as you stand looking a the car (a car) without leaning in , you wont tell the difference...it will look the same , just more work, but 10 minutes is`nt bad, I`m just lazier (as you know too!)
|
|
|
|
|
Joined: Jan 2002
Posts: 7,719
Power Member
|
|
Power Member
Joined: Jan 2002
Posts: 7,719 |
I did the exact same thing using a Dremel with a sanding drum. It took me forever. I still broke one rib which I fixed with JB Weld.
2012 Mustang Boss 302 #1918, Competition Orange. FGF replacement
2006 Mustang V6 Pony, Vista Blue. Factory ordered.
2019 BMW X3 (Titled to the wife, but I'm always driving it for her. So I'm claiming it)
Old projects, gone but not forgotten:
1967 FB 400, original CA car. After 22 years of work, trashed by the guy who was supposed to paint it. I had to sell it.
1980 Turbo Trans Am
1970 Mustang fastback, 351C 4Bbl, auto
1988 Mustang GT, 5 speed
1983 F-150 4x4, built 302
1994 Chevy K2500 HD 4x4, 454 TBI
|
|
|
|
|
Joined: Aug 2006
Posts: 1,071
Member
|
|
Member
Joined: Aug 2006
Posts: 1,071 |
I'm thinking of fastening some kind of aluminum mesh in mine once I ever get the rest cut out. It'll either work, or I'll ruin them...
|
|
|
|
|
Joined: Jul 2005
Posts: 3,889
Senior Member
|
|
Senior Member
Joined: Jul 2005
Posts: 3,889 |
I was going to cut out the whole center of the spare pair I have. But now I'll go this route for sure.
Tom '69 Firebird 400 4spd conv  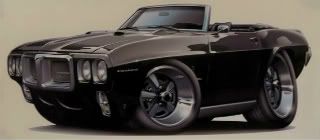
|
|
|
|
|
Joined: Jan 2006
Posts: 9,027
Power Member
|
|
Power Member
Joined: Jan 2006
Posts: 9,027 |
Would a dremel work? What kind of bit did you use on the die grinder? I like what you've done, looks great
|
|
|
|
|
Joined: Jan 2002
Posts: 7,719
Power Member
|
|
Power Member
Joined: Jan 2002
Posts: 7,719 |
I used a Dremel and a course sanding drum. I wanted to go slowly to not break any of the ribs. They are REALLY thin when you are done.
2012 Mustang Boss 302 #1918, Competition Orange. FGF replacement
2006 Mustang V6 Pony, Vista Blue. Factory ordered.
2019 BMW X3 (Titled to the wife, but I'm always driving it for her. So I'm claiming it)
Old projects, gone but not forgotten:
1967 FB 400, original CA car. After 22 years of work, trashed by the guy who was supposed to paint it. I had to sell it.
1980 Turbo Trans Am
1970 Mustang fastback, 351C 4Bbl, auto
1988 Mustang GT, 5 speed
1983 F-150 4x4, built 302
1994 Chevy K2500 HD 4x4, 454 TBI
|
|
|
|
|
Joined: May 2001
Posts: 3,615
Premium Member
|
|
Premium Member
Joined: May 2001
Posts: 3,615 |
That REALLY looks good! Please give us some detailed instructions...
I'm a hobbyist. Not a professional. Don't be hatin'!
|
|
|
|
|
Joined: Jan 2006
Posts: 2,131
Member
|
|
Member
Joined: Jan 2006
Posts: 2,131 |
just use an 1/8" cut-off wheel with the attachment in the die grinder. space things 1/4 inch from each other for even spacing. should get fairly good results with it! nice job KEL! glad to see your here as well!
Andy
due to budget cutbacks, the light at the end of the tunnel has been disconnected for non payment.
|
|
|
|
|
Joined: Jun 2000
Posts: 20,054
Administrator
|
|
Administrator
Joined: Jun 2000
Posts: 20,054 |
Not wanting to rain on anybodys parade here, but....
I dont know why you want them open?? unless you have Ram Air set up...
well, it "looks" real..but with black paint vs. the real opening, you eliminate a couple of problems...
1) bugs
2) dust
3) rain,....which I think would be the worst..think about it..it rains it goes in there..its not like when it hit radiator and disperses on a hot engine, and evaporates..
up by the scoops , you have 2 situations , one, if you have the insulation ,it will stay moist up there, cause rust..
two, if you dont have insulation , moisture will blow in under the braces on the top of the hood, and into the back corners , and "maybe" evaporate if its really hot up there , but if its not ,you`ll have water or moisture up under those braces and it will eventually rust...
jmho
actually ,in my case I went the other direction, I didnt like the small amouts of water coing in around the scoops ,that wont seal 100%, even at washing the car, so I sealed the scoops to the hood with silicone (that you cannot see)after paint, so nothing gets by...esp, since I have the hood insulation ,and dont want any moisture under there...( I may have problems anyway ,since I bought a used hood that had surface rust ,and I couldnt remove all of it under the braces or in corners ( I sprayed in TecWax, but not sure it would get everywhere)....I expect that to bubble up after a few years)
|
|
|
|
|
Joined: Jan 2006
Posts: 9,027
Power Member
|
|
Power Member
Joined: Jan 2006
Posts: 9,027 |
Yin and Yang! I like the look but I too am having second thoughts after the "REALLY THIN" comment. I can just see some kid poking his grubbly lil fingers in there and poking a hole thru! Think I'll have a brown pop and think about it! 
|
|
|
|
|
Joined: Nov 2006
Posts: 6,341
Power Member
|
|
Power Member
Joined: Nov 2006
Posts: 6,341 |
Before I cut the "backs" off of mine 6 years ago, I did the same thing, only I used the small cut off discs that come with the Dremel tool and I went from the back and let the disc grind through the lower portion of the rib. It worked perfectly and looked nice. However, once I was done I wasn't sure what the point was and had spent so much time doing it. Then I took the same cut off disc and cut the back off the other one. Fortunately for me, I liked the look of the open one better and then cut the ribs out of the other side. Then I took the grinding stone attachment and cleand up the surface. They ultimately came out really nice and I am happy with them...
|
|
|
|
|
Joined: Nov 2006
Posts: 6,341
Power Member
|
|
Power Member
Joined: Nov 2006
Posts: 6,341 |
When we first arrivd at the Pontiac Nationals this past Friday, we had a fair number of "techs" decend upon our car. I guess maybe becuase the car has never been to this show or what have you, but nonetheless, a few of them actually commented on the open scoops as to how nice they looked etc. I told them I had cut the backs off myself and they said they looked very clean. The only thing is, I have mine painted semi-flat black. I am wondering now if I should get them painted the car color. Any thoughts on this?
|
|
|
|
|
Joined: May 2001
Posts: 3,615
Premium Member
|
|
Premium Member
Joined: May 2001
Posts: 3,615 |
Sounds to me that Kel sanded off material until only the "ribs" remained. There was no "cutting" of material using a rotary saw.
I'm a hobbyist. Not a professional. Don't be hatin'!
|
|
|
|
|
Joined: Oct 2006
Posts: 417
Premium Member
|
|
Premium Member
Joined: Oct 2006
Posts: 417 |
I used the HF die grinder, and a Black & Decker Workmate to hold them. I think it was 100 grit pad. Just start sanding, side to side, concentrating in the middle a little more. Once the ribs appeared in middle, started working towards the outsides,I know some that used a nail file to smooth out afterwards, pretty simple, just take a little bit at a time, not too much pressure when sanding. As my esteemed colleague Bjorn stated, not sure about the functionality of having them open, but it looks cool and makes for some good discussion Kel
Last edited by 68blackbird; 08/14/07 02:33 AM.
|
|
|
|
|
Joined: Sep 2001
Posts: 14,265
Valued Mentor
|
|
Valued Mentor
Joined: Sep 2001
Posts: 14,265 |
If you really want to draw attention and start discussions then paint some eyeballs on them and back up with red lighting.
|
|
|
|
|
Joined: Dec 2005
Posts: 5,108
Power Member
|
|
Power Member
Joined: Dec 2005
Posts: 5,108 |
A red glow from inside looks cool at night.
Did not years ago on mine. Had a trailer marker lamp mounted to the underside of the hood.
Have one now in the TA shaker scoop. Get alot comments.
|
|
|
|
|
Joined: Oct 2006
Posts: 417
Premium Member
|
|
Premium Member
Joined: Oct 2006
Posts: 417 |
A red glow from inside looks cool at night. I considered painting them red, kinda on going joke within HALF group. I think I am going to paint black on outside, with red ribs, then use red LED's I used to use for under hood lighting behind scoops...that'll look neat.....I think 
|
|
|
|
|
Joined: Aug 2006
Posts: 190
Member
|
|
Member
Joined: Aug 2006
Posts: 190 |
Sounds like fun, I want open scoops too. I'm wondering, can I also put a set of the cheap fiberglass pans (67/68 style) on my 69 with the existing Edel. Performer carb and intake? Not sure if it mounts the same to the hood for all 3 years. On topic I hope. Thanks
Randy 
|
|
|
|
|
Joined: Sep 2001
Posts: 14,265
Valued Mentor
|
|
Valued Mentor
Joined: Sep 2001
Posts: 14,265 |
It mounts to the hood different but an early style pan will fit/work. They only problem you may have is height of the carb. There are many ways to adjust for this.
|
|
|
|
|
Joined: Apr 2007
Posts: 547
Member
|
|
Member
Joined: Apr 2007
Posts: 547 |
I'm wondering, can I also put a set of the cheap fiberglass pans (67/68 style) on my 69 with the existing Edel. Performer carb and intake? Not sure if it mounts the same to the hood for all 3 years. On topic I hope. Thanks The 67/68 differs greatly from the 69 setup. You can use the 67/68 baseplate on the 69, but the 67/68 upper pan won't work on the 69. The 67/68 upper pan was shaped like a pentagon (5 sides). At the peak of that pentagon was a bolt hole. The underhood bracing on the 69 Firebird hood has no provision for that bolt. In fact, that portion of the bracing is scalloped away completely on the 69 hood. The 69 underhood bracing change was for safety reasons to allow the hood to crumple in the event of a front end collision. The upper pan for the 69 Bird had the same pentagon shape, but at the peak of that pentagon, it was scalloped out, and used two bolts instead of 1.
|
|
|
|
|
Joined: Feb 2005
Posts: 1,219
Member
|
|
Member
Joined: Feb 2005
Posts: 1,219 |
GREAT thread!
This scoop issue is a detail on my car that's been driving me batty.
I picked up a 2nd pair of closed scoops in hopes of having two sets -open and closed. (Even better, solenoid actuated flappers.)
Anyway, I don't want to:
1. Spend big bux on a repro ram-air pan set ($550+)
2. Have semi functional scoops that look correct but ram the air to nowhere
3. Delete my A/C since it is incompatible with the repro pan
It's not rocket science to have some plastic "hoses" that connect from the inlets to an enclosed air filter. Obviously the trick is fabbing something functional and durable to do the job.
Hmmm - prototyping....
|
|
|
|
|
Joined: Aug 2006
Posts: 190
Member
|
|
Member
Joined: Aug 2006
Posts: 190 |
Won't the 67/68 set-up work with air either? I thought only the 69 wouldn't. I was hoping to adapt the simpler,less expensive 67/68 system to my 69. I was hoping that fitting the hood pan would be my biggest problem. Back to the drawing board.
Randy
|
|
|
|
|
Joined: Nov 2006
Posts: 6,341
Power Member
|
|
Power Member
Joined: Nov 2006
Posts: 6,341 |
I will soon have an upper hood pan (fireglass) available as I did just buy a steel lower (sold the fiberglass lower at the show last w/e). I did order the steel upper pan while I was at the show, once I receive it I will sell the fiberglass one to anyone who may be interested...
|
|
|
|
|
Joined: Apr 2007
Posts: 547
Member
|
|
Member
Joined: Apr 2007
Posts: 547 |
The 69 RAIII style lower pan will definately work with a/c. This is the style that has one "ear" of the pan cut off on the passenger side. The 69 RAIV lower pan does not have the "ear" cut off, and is more symmetrical. The 69 RAIV lower pan will not work wih a/c. This was intentional, as RAIV cars were not available with air conditioning. Remember, the 67/68 pans are totally different than the 69, and nothing will interchange between the pan setups. The 69 uses a small filter up in the hood, the 67/68 uses a traditional baseplate/14" filter/lid. There are some tricks to mounting that upper pan. Let us know if you need some tips. Not sure if you've done this before. 
|
|
|
|
|
Joined: Aug 2006
Posts: 190
Member
|
|
Member
Joined: Aug 2006
Posts: 190 |
Has anyone attempted to bolt a 67/68 hood pan to a 69 car? I was just hoping to use the fiberglass pans, not looking for a correct set up, just something (cheap)I can make work for looks and fun. I also have a Performer intake and carb, not stock. (and a/c). Thanks
Randy
|
|
|
|
Forums57
Topics35,534
Posts298,850
Members8,861
| |
Most Online19,810
Feb 1st, 2026
|
|
|
0 members (),
2,110
guests, and
46
robots. |
|
Key:
Admin,
Global Mod,
Mod
|
|
|
There are no members with birthdays on this day. |
|
|
|

.jpg "scoops opened 4 (Medium).jpg
Views: 399
Size: 48.63 KB")


.jpg "scoops grinder (Medium).jpg
Views: 395
Size: 71.23 KB")


