|
|
Joined: Jun 2007
Posts: 130
Member
|
|
Member
Joined: Jun 2007
Posts: 130 |
My CC looks a bit ragged and I was wondering what suggestions you mighty Firebird gurus have on the subject. My burlwood is pretty ratty on the door and faded badly elsewhere. It's complete, but fugly nonetheless.
Say hello to my leetle friend..Presenting the "FIRETOAD"  
|
|
|
|
|
Joined: Jul 2005
Posts: 3,889
Senior Member
|
|
Senior Member
Joined: Jul 2005
Posts: 3,889 |
There are kits to restore the burl wood through the vendors. As to there quality I'll have to let others chime in. I do know the old vinyl should be removed before applying the new.
Tom '69 Firebird 400 4spd conv  
|
|
|
|
|
Joined: Jun 2007
Posts: 130
Member
|
|
Member
Joined: Jun 2007
Posts: 130 |
I've seen the kit for 4-speed consoles and I would imagine you could cut it to fit an automatic.
Any suggestions on removing the old burl? I plan to completely disassemble the unit today to see exactly how far I can go. It looks like the surface the decal is stuck to is metal.
Not sure though.
Say hello to my leetle friend..Presenting the "FIRETOAD"
|
|
|
|
|
Joined: Sep 2001
Posts: 14,265
Valued Mentor
|
|
Valued Mentor
Joined: Sep 2001
Posts: 14,265 |
I used a kit from NPD on one of my cars that I sold. I went right over the old burlwood and it worked good. You have to sand the surface and make sure it's smooth. The only complaint I had was it looked a little too new. It's the best thing out there.... Nash did his too. Maybe he will post some pics and insight.
|
|
|
|
|
Joined: Mar 2004
Posts: 11,905
Valued Mentor
|
|
Valued Mentor
Joined: Mar 2004
Posts: 11,905 |
The burlwood applique kits currently available have the correct image, but the appearance is nothing like original. If you are replacing all the woodgrain surfaces with the same applique it won't be so bad.
The new applique is a low gloss satin finish; the original is significantly higher gloss. A very thorough cleaning of any remaining original pieces to remove waxes and oils may help with matching.
The pattern of indentations to accent the grain are also much less prominent in the new applique.
|
|
|
|
|
Joined: Sep 2001
Posts: 14,265
Valued Mentor
|
|
Valued Mentor
Joined: Sep 2001
Posts: 14,265 |
And it's slightly difficult to get it to look perfect. The corners have to be curled under and matched up just right. When I did mine I tried a few kinds of adhesive. What I found that worked the best was laminant adhesive. The kind you use on counter tops. The stuff without the fumes is what works. It's the white, milky kind. Water based. The thinner based product will melt the applique.
|
|
|
|
|
Joined: Jun 2000
Posts: 20,054
Administrator
|
|
Administrator
Joined: Jun 2000
Posts: 20,054 |
And it's slightly difficult to get it to look perfect. The corners have to be curled under and matched up just right. When I did mine I tried a few kinds of adhesive. What I found that worked the best was laminant adhesive. The kind you use on counter tops. The stuff without the fumes is what works. It's the white, milky kind. Water based. The thinner based product will melt the applique. this is why I live with my old faded burlwood...some Armorall on it seems to help..
|
|
|
|
|
Joined: Sep 2001
Posts: 14,265
Valued Mentor
|
|
Valued Mentor
Joined: Sep 2001
Posts: 14,265 |
Old, faded burlwood is not a bad thing. It's like a patina. Some are really badly flaking though. It's not so good laying your arm on a flaky console.
|
|
|
|
|
Joined: Mar 2004
Posts: 11,905
Valued Mentor
|
|
Valued Mentor
Joined: Mar 2004
Posts: 11,905 |
I've considered restoring one of my spare console tops with genuine elm burl. I think it would look much better than second rate vinyl.
|
|
|
|
|
Joined: Jun 2000
Posts: 20,054
Administrator
|
|
Administrator
Joined: Jun 2000
Posts: 20,054 |
Old, faded burlwood is not a bad thing. It's like a patina. Some are really badly flaking though. It's not so good laying your arm on a flaky console. faded , like the owner...I`ve got some "patina" too....lol and Armorall doesnt help me... 
|
|
|
|
|
Joined: Jun 2007
Posts: 130
Member
|
|
Member
Joined: Jun 2007
Posts: 130 |
Old, faded burlwood is not a bad thing. It's like a patina. Some are really badly flaking though. It's not so good laying your arm on a flaky console. That's my primary issue at this point. The door is rough enough to chaff elbows and is flaking badly. I just got it all apart this morning so I'm now deciding what I want to do with it. My car will never be anything close to a pristine original machine so I'm thinking of alternate idea besides the burl. IMHO, fake wood trim is kind of tacky anyhow. Been tossing around the idea of either anodizing the metal portion, or chroming it.
Say hello to my leetle friend..Presenting the "FIRETOAD"
|
|
|
|
|
Joined: Sep 2001
Posts: 14,265
Valued Mentor
|
|
Valued Mentor
Joined: Sep 2001
Posts: 14,265 |
I've considered restoring one of my spare console tops with genuine elm burl. I think it would look much better than second rate vinyl. That would be the way to go. The absolute best. Another way to go would be the simulated burlwood stamper that antiquers use. A good antiquer can put the burlwood design on anything and you would think it's real.
|
|
|
|
|
Joined: Mar 2004
Posts: 11,905
Valued Mentor
|
|
Valued Mentor
Joined: Mar 2004
Posts: 11,905 |
I have refinished one that was beyond use with SEM Landau Black paint and it looks as if it could have been factory; coupled with a center dash or dash panel similarly treated it would give a minimalist, clean look with the chrome accents.
|
|
|
|
|
Joined: Jun 2007
Posts: 130
Member
|
|
Member
Joined: Jun 2007
Posts: 130 |
I have refinished one that was beyond use with SEM Landau Black paint and it looks as if it could have been factory; coupled with a center dash or dash panel similarly treated it would give a minimalist, clean look with the chrome accents. I think that's the route I'm leaning towards at this point.
Say hello to my leetle friend..Presenting the "FIRETOAD"
|
|
|
|
|
Joined: Jan 2006
Posts: 9,027
Power Member
|
|
Power Member
Joined: Jan 2006
Posts: 9,027 |
I did mine with the self adhesive backed burl I purchased from Ebay and was very happy with the results. I too just left the old on and used silicone polish remover to get all the old armour all etc residue off. Stuck like Sh!t to a blanket. I like the less glossy look and will be doing the dash piece this winter to match, altho one has to look pretty closely to tell there is a diff.
I like Vicky's idea of real burl veneer. I have worked with veneers before building stereo speakers in my younger days...very satisfying ...may just try it on a console!
|
|
|
|
|
Joined: May 2007
Posts: 134
Member
|
|
Member
Joined: May 2007
Posts: 134 |
my biggest problem with the burlwood applique kits is that it doesnt include an applique for the center dash bezel of radio face plate. additionally i dont believe anyone sells a repos.
I couldn't deal with two different color burlwoods. Aside from the sheen the appliques are much darker than the originals too. Once again I located some original componets and threw them in, they match, and they look great.
i could use another console door though, mine has a slight ding in it
|
|
|
|
|
Joined: Jun 2007
Posts: 130
Member
|
|
Member
Joined: Jun 2007
Posts: 130 |
i could use another console door though, mine has a slight ding in it Mine has the same (Don't most of them?) but I plan to just use a touch of spot putty to fill the 'dent'. What would you all recommend to remove the old burl with? Edit; Just BIN'd a burl repacement for auto console off eBay. I'll let everyone know if it's pure caca or if it's a decent alternative to burl-itis
Last edited by redvert68; 10/15/07 07:32 PM.
Say hello to my leetle friend..Presenting the "FIRETOAD"
|
|
|
|
|
Joined: Sep 2001
Posts: 14,265
Valued Mentor
|
|
Valued Mentor
Joined: Sep 2001
Posts: 14,265 |
|
|
|
|
|
Joined: Jun 2007
Posts: 130
Member
|
|
Member
Joined: Jun 2007
Posts: 130 |
Thanks Jim. I had a feeling it was either that or a blow torch 
Say hello to my leetle friend..Presenting the "FIRETOAD"
|
|
|
|
|
Joined: Jan 2005
Posts: 1,859
Member
|
|
Member
Joined: Jan 2005
Posts: 1,859 |
You can see a picture of the NPD kit in my signature. Its a good kit, but as Jim said its really tough to get the seams right. Just use a non-acidic adhesive and you will be ok. I used a spray adhesive from Hobby Lobby. Ignore the seems in the front of the picture. Since the idiot that owned the car before me decided to hack up the console [which I had to fix] I had to move the console applique back and then do some patchwork in the front. You wont have to worry about these seams. Here are a few pictures:   
Last edited by 68 BLKBRD; 10/16/07 12:55 AM.
http://firstgenfirebird.org/show/closeup.mv?CarID=646 ----------------------------------- Joe ----------------------------------- 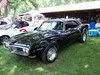 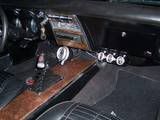   >> |^^^^^^^^^^^^^^'''''| || >> |...BEER TRUCK......| ||'|";, ___. >> |_..._..._______===|=||_|__|..., ] - >> "(@)'(@)""""""""''"**|(@)(@)******''(@)
|
|
|
|
|
Joined: Jun 2007
Posts: 130
Member
|
|
Member
Joined: Jun 2007
Posts: 130 |
That sure looks better than what I'm working with at this point. What would be a good material to use to reline the console storage box? It looks like there is some type of odd 'flocking' material in mine now and it bleeds color like a stuck pig.
Say hello to my leetle friend..Presenting the "FIRETOAD"
|
|
|
|
|
Joined: Jan 2006
Posts: 9,027
Power Member
|
|
Power Member
Joined: Jan 2006
Posts: 9,027 |
Actually the guy on Ebay I got my console applique from said he does have the centre radio kit. Unfortunately I cannot recall who he is but will check for you.
I have a flocking kit to redo mine and hope to do it this winter. I know some others here have done it....not sure what you mean by bleeds color tho. The flocking kit I have has an adhesive and black material...
|
|
|
|
|
Joined: Jan 2006
Posts: 9,027
Power Member
|
|
Power Member
Joined: Jan 2006
Posts: 9,027 |
I believe it was "firstclassparts", he has a console kit on there now ending in 5 minutes, I have asked him again about the radio panel kit, and will let you know when he replies.
|
|
|
|
|
Joined: Jun 2007
Posts: 130
Member
|
|
Member
Joined: Jun 2007
Posts: 130 |
Thanks Dave. By color bleed I mean that when I was washing and then drying the console, a paper towel used inside the storage area turned a nasty purple. Prolly cuz it was so old
Say hello to my leetle friend..Presenting the "FIRETOAD"
|
|
|
|
|
Joined: Jun 2003
Posts: 1,739
Member
|
|
Member
Joined: Jun 2003
Posts: 1,739 |
I reflocked mine with a kit for flocking decoy ducks. It came out very nice. I just thinned the adhesive per instructions and sprayed through my paint gun, then applied the flocking material. I shook off the excess the next day and it was done.
|
|
|
|
|
Joined: Jun 2007
Posts: 130
Member
|
|
Member
Joined: Jun 2007
Posts: 130 |
So now everytime you open the console door, it quacks? Sorry, I couldn't resist 
Say hello to my leetle friend..Presenting the "FIRETOAD"
|
|
|
|
|
Joined: Jan 2006
Posts: 9,027
Power Member
|
|
Power Member
Joined: Jan 2006
Posts: 9,027 |
No but a flock of ducks come in to roost on his window crossbar..
Thats the same kit I have John, will be trying it soon.
|
|
|
|
|
Joined: Jan 2006
Posts: 9,027
Power Member
|
|
Power Member
Joined: Jan 2006
Posts: 9,027 |
Here's his response as promised; We do sell the dash kit. Cost is 39.95 plus shipping. We would need your zip code to quote you. First Class Parts P.O. Box 261 Palmyra, Pa 17078 Replies sent M-F 8am-4:30pm EST. [email protected]
|
|
|
|
|
Joined: Jun 2007
Posts: 130
Member
|
|
Member
Joined: Jun 2007
Posts: 130 |
That's flocking awesome! Thanks Dave. I'll keep that address handy for when I'm ready to conquer the dash.
Say hello to my leetle friend..Presenting the "FIRETOAD"
|
|
|
|
|
Joined: Jun 2007
Posts: 130
Member
|
|
Member
Joined: Jun 2007
Posts: 130 |
I received the burl replacement yesterday and I must say, it looks pretty good. It has the similar texture the old one had plus the color and tone of the burl is very close to the ashtray and dash panel burl. Being they're seen at different angles when in the car, I think I've got a passable solution to my Burd's case of burl-itis. I will snap some pictures of the finished product after I get it installed.
Quick question..Is there a quick and easy wasy to remove the auto shifter trim panel from around the shifter without disassembling the entire shifter? I looked at it for a while and the answer bedaffles me. (my eyes aren't the best either)
Say hello to my leetle friend..Presenting the "FIRETOAD"
|
|
|
|
|
Joined: Mar 2004
Posts: 11,905
Valued Mentor
|
|
Valued Mentor
Joined: Mar 2004
Posts: 11,905 |
Lift off the black button on the shifter (tight, spring clip fit). Use an allen wrench to loosen the set screw, remove the T handle. Plate will lift free.
|
|
|
|
|
Joined: Mar 2002
Posts: 6,986
Requiescat In Pace
|
|
Requiescat In Pace
Joined: Mar 2002
Posts: 6,986 |
reminds me of the flock of sea gulls
|
|
|
|
|
Joined: Jul 2005
Posts: 1,241
Member
|
|
Member
Joined: Jul 2005
Posts: 1,241 |
reminds me of the flock of sea gulls 
 400HO vert, 3 speed, 8-track, deluxe parchment/flambeau burgandy
|
|
|
|
|
Joined: Jan 2006
Posts: 9,027
Power Member
|
|
Power Member
Joined: Jan 2006
Posts: 9,027 |
You mean when your dashing, your always flocking. 
|
|
|
|
|
Joined: Jun 2007
Posts: 130
Member
|
|
Member
Joined: Jun 2007
Posts: 130 |
Lift off the black button on the shifter (tight, spring clip fit). Use an allen wrench to loosen the set screw, remove the T handle. Plate will lift free. I was afraid you were going to say that. I've replaced the original because the snap clips were broken. I'm wondering if removing the replacement will snap the clips also. Dilemma time
Say hello to my leetle friend..Presenting the "FIRETOAD"
|
|
|
|
|
Joined: Mar 2004
Posts: 11,905
Valued Mentor
|
|
Valued Mentor
Joined: Mar 2004
Posts: 11,905 |
The repro plastic seems to be a little less brittle. I've pulled the button on my '68 shifter a half a dozen times now. And besides, they are cheap.
|
|
|
|
|
Joined: Jun 2007
Posts: 130
Member
|
|
Member
Joined: Jun 2007
Posts: 130 |
That's encouraging. And it was pretty cheap. I just remember having the old one shoot halfway across the car every time I manually shifted the TH400. It got to be a contest to see how far I could get it to fly.
Say hello to my leetle friend..Presenting the "FIRETOAD"
|
|
|
|
|
Joined: Jun 2007
Posts: 130
Member
|
|
Member
Joined: Jun 2007
Posts: 130 |
Holy smokes Batman!
I spent a good half-hour with the orbital sander(or until my carpal tunnels were screaming) trying get that the factory burl off my console. I barely nicked it and I was using 150 grit!
Grr. Next step, 80 grit?
Say hello to my leetle friend..Presenting the "FIRETOAD"
|
|
|
|
|
Joined: Sep 2001
Posts: 14,265
Valued Mentor
|
|
Valued Mentor
Joined: Sep 2001
Posts: 14,265 |
Use the 150 to take out the scratches from the 80 grit. Then 320 to finish it off.
|
|
|
|
Forums57
Topics35,546
Posts298,900
Members8,865
| |
Most Online19,810
Feb 1st, 2026
|
|
|
1 members (Jimc2002),
235
guests, and
26
robots. |
|
Key:
Admin,
Global Mod,
Mod
|
|
|
There are no members with birthdays on this day. |
|
|
|