|
|
Joined: Apr 2007
Posts: 2,770
Senior Member
|
|
Senior Member
Joined: Apr 2007
Posts: 2,770 |
So I checked my heater radiator, since it was bypassed. Put some air pressure on it, and heared a little hisssss underneath the passengers side dash. So I got a new radiator and wanna replace it. But that looks like a hell of a job! According to the manual, the right front fender needs to come off in order to get to the heater radiator from the engine side. Or at least you have to release the front fende on the door side and wedge it open to get to it.
Sounds like an awefull lot of work. Any experience...? Any other way? I can't get to it from inside the car, so it seems...
|
|
|
|
|
Joined: Sep 2001
Posts: 14,265
Valued Mentor
|
|
Valued Mentor
Joined: Sep 2001
Posts: 14,265 |
The good news; You don't have to mess with the fender. You need to take that heater box right out that's under the dash behind your glove box. Take a look at those bolts that go around it. They are the major work of the job. Check this recent thread for a little more info; /forums/ubbthreads.php?ubb=showflat&Number=118710&fpart=2
|
|
|
|
|
Joined: Jan 2006
Posts: 9,027
Power Member
|
|
Power Member
Joined: Jan 2006
Posts: 9,027 |
Yup, I just completed that. I downloaded a pic of a heater box off ebay to confirm the location of all the bolts /studs, got them off from the firewall side, then the inner came off after a little coaxing (as the studs were tight against the caulked in outer in some spots), but with a little tapping out it came. Fenders still right where it should be...on the car 
|
|
|
|
|
Joined: Apr 2007
Posts: 2,770
Senior Member
|
|
Senior Member
Joined: Apr 2007
Posts: 2,770 |
You still got that pic? Or any pics of your resto?
|
|
|
|
|
Joined: Jan 2006
Posts: 9,027
Power Member
|
|
Power Member
Joined: Jan 2006
Posts: 9,027 |
I had a diff (new) pic but this will do. These are ALL accessible with Fender ON.....I do recall removing the inner fender brace to make it easier to get at one. 
|
|
|
|
|
Joined: Apr 2007
Posts: 2,770
Senior Member
|
|
Senior Member
Joined: Apr 2007
Posts: 2,770 |
Great, thanx! Must have missed the earlier thread on this subject, thanx for the link Jim. Good thing it can be done without the fender comming off, big relief!
David, just as a reference before I start, seen from the inside, what did you remove, how many bolts keep the entire system in place on the dash side? Or are the bolts from the firewall the most important ones? Did you take off the "duct" first and then the "case" (as they are called in the parts index of Vikki's library)? Since the core is inside the "CASE", I wondered if it can't come off as one piece, but your pic shows the case apart.
|
|
|
|
|
Joined: Nov 2005
Posts: 2,175
Member
|
|
Member
Joined: Nov 2005
Posts: 2,175 |
great info, I have to replace my heator core too.. thanks... and while we are here... (pardon me for butting in) Item no 48 in the below pic is broken in my car, I believe it's the heater resistor, what does it do? where can I get one? might as well do that at the same time... thanks again! 
     It's only a hobby... It onl a hob.. it o ob. It's only a hobby... It onl a hob.. it o ob.
|
|
|
|
|
Joined: Dec 2007
Posts: 10,338 Likes: 3
Premium Member
|
|
Premium Member
Joined: Dec 2007
Posts: 10,338 Likes: 3 |
My '67 needs to be replaced too. Lets set up our own assembly line. Or would it be re-assembly line?
I used to be indecisive. Now I'm not sure. I feel like I am diagonally parked in a parallel universe. 1968 400 convertible (Scarlet) 1976 T/A - 455 LE (No Burt) 1976 T/A New baby, starting full restoration. 1968 350 - 4 speed 'vert - 400 clone (the Beast!) 1968 350 convertible - Wife's car now- 400 clone (Aleutian Blue) (Blue Angel) 2008 Durango - DD 2008 GXP - New one from NH is AWESOME! 2017 Durango Citadel - Modern is nice! HEMI is amazing! 1998 Silverado Z71 - Father-daughter project 1968 400 coupe - R/A clone (Blue Pearl) (sold) 1967 326 convertible - Sold  1980 T/A SE Bandit - Sold
|
|
|
|
|
Joined: May 2001
Posts: 3,615
Premium Member
|
|
Premium Member
Joined: May 2001
Posts: 3,615 |
Not a difficult project. Just be patient...and learn to contort your body into a pretzel.
I'm a hobbyist. Not a professional. Don't be hatin'!
|
|
|
|
|
Joined: Jan 2006
Posts: 2,131
Member
|
|
Member
Joined: Jan 2006
Posts: 2,131 |
great info, I have to replace my heator core too.. thanks... and while we are here... (pardon me for butting in) Item no 48 in the below pic is broken in my car, I believe it's the heater resistor, what does it do? where can I get one? might as well do that at the same time... thanks again! can be had from any of the major parts houses and a camaros unit should work!! it allows power to the fan if im not mistaken but im sure someone know more precisely what goes on!!
Last edited by drew67; 03/05/08 08:48 PM.
Andy
due to budget cutbacks, the light at the end of the tunnel has been disconnected for non payment.
|
|
|
|
|
Joined: Jan 2006
Posts: 9,027
Power Member
|
|
Power Member
Joined: Jan 2006
Posts: 9,027 |
no bolts from the inside, just the 5 on the firewall, remove the duct on the inside, pull and drop it down, I managed to replace the core with out removing the control wires, you may elect to pull the whole box out if you want to do any restoration. Sorry JM, not sure about the resistor.....my books are at the wrong end of town at present
|
|
|
|
|
Joined: Apr 2007
Posts: 2,770
Senior Member
|
|
Senior Member
Joined: Apr 2007
Posts: 2,770 |
I am still a bit confused.. So with the risk be being found stupid I still have some questions!
Could there be a difference between 67 and 68 Firebirds concerning the heater core? Is the motor separted from the case in 68's and in one piece in 67's?
On Davids pics it shows that the case has 2 bolts on the outer side, underneath the front fender, as seen on the pic A below. Bolt number 6&7 in pic A are for the motor right --> do they stay in place? (Bolts "M" in pic E). So then you only take out bolts nr. 1-5 in pic A (or the red "C" bolts in pic E). Is that correct?
When I release those bolts, I just pull on the entire Case and duct system from underneath the dash, and it comes off right?
How come on the drawing (pic C) there are 3 bolts shown (bolts A, B, C), but on the pics there are only 2 bolts on the outside?
A (on pic C) seems like bolt I (on pic D), and C = V (pics C & D compaired), but where is bolt B from pic C gone in D? Sorry for the confusing letters and numbers... Bolts A, B and C in pic C, were are they in pic A & D? Is it because 67 and 68 is different?
David, another stupid question (remember english is not my first language... Try doing this in dutch!), the inner fender brace, were is it located? Can you see it in pic B? Does the hood hinge come off...?
Thanx for all the info. I'm not as much of a garage head as some of you guys and just like to be prepared...
Wouter
|
|
|
|
|
Joined: Sep 2001
Posts: 14,265
Valued Mentor
|
|
Valued Mentor
Joined: Sep 2001
Posts: 14,265 |
Your picture D shows the bolts(nuts), 1-5, that need to come out. Picture A is missing one bolt hole in it between 4 and 5. The fender brace partially blocks number 5 in pic A.
|
|
|
|
|
Joined: Apr 2007
Posts: 2,770
Senior Member
|
|
Senior Member
Joined: Apr 2007
Posts: 2,770 |
Okay, so when I release these 5 bolts, I move to underneath the dash, and then pull off the "Case" and "duct" as one piece and see the heater? Or does the duct need to come off the case?
|
|
|
|
|
Joined: Mar 2001
Posts: 3,912
Senior Member
|
|
Senior Member
Joined: Mar 2001
Posts: 3,912 |
Your making this harder than it really is.
After removing the nuts on the firewall side and the heater hoses(If attached) go underneath slowly pull the box out(So the heater core tubes clear firewall) and down.
Once the box is down on the floor you'll see what need s to be removed next heater control cables, etc,
Then take the box outside of the car remove heater core install new.
Rehook heater control cables etc, then proceed to put the box back up and in.
BE very careful when putting heater core tubes thru firewall as you can damage the heater core causing it to leak.
So look at where the holes are at and keep that in mind as you slowly reinstall the box.
|
|
|
|
|
Joined: Jan 2006
Posts: 9,027
Power Member
|
|
Power Member
Joined: Jan 2006
Posts: 9,027 |
Doug and Jim are spot on...don't know why my firewall in that pic does not show the middle hole (between 4-5)well. The brace is roughly where my ugly blue plug wires dissappear by the exhaust manifolt in pic B, screws into the inner fender and down to the firewall. Its about maybe 8-10" long, 3-4" wide and somewhat peaked or pointed at each end...with a bit of a twist in it... Its a liittle finicky pulling the box out from the inside as the core tubes curve to the pass side and want to hit the outer fan box....but it will come.... Where'd ya get all my pics from? 
Last edited by Dave's White Rock '68 Droptop; 03/06/08 06:16 PM.
|
|
|
|
|
Joined: Apr 2007
Posts: 2,770
Senior Member
|
|
Senior Member
Joined: Apr 2007
Posts: 2,770 |
Thanx, that's what I wanted to know..  I needed it explained to me like I'm a two year-old...!
|
|
|
|
|
Joined: Apr 2007
Posts: 2,770
Senior Member
|
|
Senior Member
Joined: Apr 2007
Posts: 2,770 |
David, I got your pics from your FLICKR signature, thanx! They've been a great help!
|
|
|
|
|
Joined: Jan 2006
Posts: 9,027
Power Member
|
|
Power Member
Joined: Jan 2006
Posts: 9,027 |
Right about down there somewhere... 
Last edited by Dave's White Rock '68 Droptop; 03/06/08 06:24 PM.
|
|
|
|
|
Joined: Jan 2006
Posts: 9,027
Power Member
|
|
Power Member
Joined: Jan 2006
Posts: 9,027 |
David, I got your pics from your FLICKR signature, thanx! They've been a great help!
of course.....doh! 
|
|
|
|
|
Joined: Jan 2006
Posts: 9,027
Power Member
|
|
Power Member
Joined: Jan 2006
Posts: 9,027 |
JM, here's one of those resistors http://cgi.ebay.com/ebaymotors/NOS-1967-...tem370027866693It provides the step down for the 3 fan speeds...
Last edited by Dave's White Rock '68 Droptop; 03/06/08 10:21 PM.
|
|
|
|
|
Joined: Nov 2005
Posts: 2,175
Member
|
|
Member
Joined: Nov 2005
Posts: 2,175 |
awesome... and only 4 hours left too!! thanks JM
It's only a hobby... It onl a hob.. it o ob.
|
|
|
|
|
Joined: Nov 2005
Posts: 2,175
Member
|
|
Member
Joined: Nov 2005
Posts: 2,175 |
crap, outbid by $10
It's only a hobby... It onl a hob.. it o ob.
|
|
|
|
|
Joined: Mar 2001
Posts: 3,912
Senior Member
|
|
Senior Member
Joined: Mar 2001
Posts: 3,912 |
One thing I forgot to mention is it helps to have someone on the firewall side watching helping eyeballing as you put the heater tubes through the firewall so you don't hit them.
|
|
|
|
|
Joined: Jan 2006
Posts: 9,027
Power Member
|
|
Power Member
Joined: Jan 2006
Posts: 9,027 |
I looked JM and did not seem to find them in the CI catalog...someone must have em...try Ricks perhaps...
Who stretched your car or is it my monitor?
|
|
|
|
|
Joined: Nov 2005
Posts: 2,175
Member
|
|
Member
Joined: Nov 2005
Posts: 2,175 |
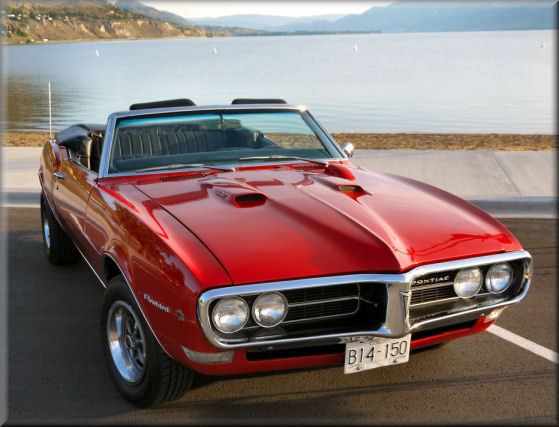
I stretched the pic to get the skyline in... not sure if I like it yet.
thanks for the tip on Ricks, it was an impulse purchase anyways
JM
It's only a hobby... It onl a hob.. it o ob.
|
|
|
|
|
Joined: Jan 2006
Posts: 9,027
Power Member
|
|
Power Member
Joined: Jan 2006
Posts: 9,027 |
I stretched the pic to get the skyline in... not sure if I like it yet.
thanks for the tip on Ricks, it was an impulse purchase anyways
JM
Would the skyline not still be there "un-stretched" ya, those eBay impulse purchases can be deadly...
Last edited by Dave's White Rock '68 Droptop; 03/07/08 07:30 PM.
|
|
|
|
|
Joined: Nov 2005
Posts: 2,175
Member
|
|
Member
Joined: Nov 2005
Posts: 2,175 |
I guess the image is flattened and stretched.. didn't want it too tall and I like the 640 width
and ebay... thats why I only keep a few hundred in the account!
It's only a hobby... It onl a hob.. it o ob.
|
|
|
|
|
Joined: Apr 2007
Posts: 2,770
Senior Member
|
|
Senior Member
Joined: Apr 2007
Posts: 2,770 |
Finally got to replacing the eater core today. Indeed it was quite easy, about one hour work! So thanx for all the advice, glad I didn't take the fender off... Simply release the bolts from the engine side, then pull the entire system off on the dash side, and change the core...
Core (ordered at AMES as 67 firebird heater radiator) was not an EXACT match (slightly thinner and less wide), but the tubes were okay, so it fitted without problems.
Some pics for people that are changing theirs in the future:
|
|
|
|
|
Joined: Apr 2007
Posts: 2,770
Senior Member
|
|
Senior Member
Joined: Apr 2007
Posts: 2,770 |
Just putting this back up there.
The heater question pops up every now & then; any idea to put in the hall of fame section for future reference?
|
|
|
|
|
Joined: Nov 2013
Posts: 120
Member
|
|
Member
Joined: Nov 2013
Posts: 120 |
I know this is an old thread, but I'm doing this now and my heater core is fastened inside the box, not on the firewall like in the photos. There is no way I can the curved tubes in when attached to the whole assembly. Fender has to come off to remove the outer box and allow clearance for the heater tubes. 
Last edited by Kyle; 01/09/14 07:46 PM.
1968 Firebird, 350 4V, TH350 with trans-go, 69 slap shifter, 8.5 inch 10 bolt 3.42 posi 
|
|
|
|
|
Joined: Apr 2021
Posts: 14
Member
|
|
Member
Joined: Apr 2021
Posts: 14 |
Reviving a very old thread, not much activity around here but I'm not sure what advice to trust from what I'm getting from Facebook and the like.
Have a '68 WITH Factory AC - leaking heater core, it's dripping on the passenger floor mat.
I have read through this and other threads, most seem to be replacing on NON-AC cars.
My main question is can this be done in similar fashion on a Factory AC car, without having to completely pull the hood/fender and inner fender? I think I can get the inner fender support bracket off if that helps access. Really don't want to have to pull all that sheet metal. But if I did, believe me, the heater core would not be the only thing replaced, on preventative grounds alone.
|
|
|
|
|
Joined: Nov 2003
Posts: 6,160 Likes: 51
Administrator
|
|
Administrator
Joined: Nov 2003
Posts: 6,160 Likes: 51 |
It is not the most glamorous but when I had the core replaced on mine decades ago, the shop cut and opened a small flap in the inner fender. Somehow, they knew the perfect spot to make the cut.
After replacing the core and hoses, they then bent the flap back into place and secured it with a few small screws and coated it all with sealant. I have since reopened the flap to replace the core a second time. I re-secured the flap, sealed it and coated the entire wheel well with an original-looking asphalt coating as specified in '68 Pontiac literature. It is only noticeable if someone looks for it in the well and sees a slight outline.
Of course, the rest of the fun is on the inside, under the dash.
Jim
'68 400HO Conv.
|
|
|
|
|
Joined: Apr 2021
Posts: 14
Member
|
|
Member
Joined: Apr 2021
Posts: 14 |
Thanks Jim. Yeah, I'd have to know more before attempting to cut an access hole. I think if that access is needed though, I'd probably just pull the inner fender. It can be removed without pulling the fender, correct, as in this is possible? It doesn't really look like there is too too much to it.
Last edited by KevinW; 11/08/21 02:20 PM.
|
|
|
|
Forums57
Topics35,545
Posts298,893
Members8,865
| |
Most Online19,810
Feb 1st, 2026
|
|
|
1 members (69musclecar),
149
guests, and
23
robots. |
|
Key:
Admin,
Global Mod,
Mod
|
|
|
There are no members with birthdays on this day. |
|
|
|